First up, get whatever you want as the image manipulated in your favourite editor. Moment of confession here: I use MS paint! LOL. Never got into PS or used it really. So there you go. Any rough edges, you know why!
Next, get the images arranged on a page in MS word. Again, commercial layout software or CAD or something like that would be infinitely better I spose, but this serves my purposes for now.
Print a test sheet to make sure it works, then go ahead and do the real deal. I posted an earlier link about where I got my decal sheets from (QP media, do a google or look for their shop on ebay). The sheets work out around a £1 each or less if you buy in more bulk, and you can go for white or transparent.
Two things to note. Inkjet ink is not indellible on these, even if left to dry, and is sensitive to moisture. Secondly, if you intend to leave them overnight to dry, they can bend, so stick between a yellow pages or other suitably heavy textbook.
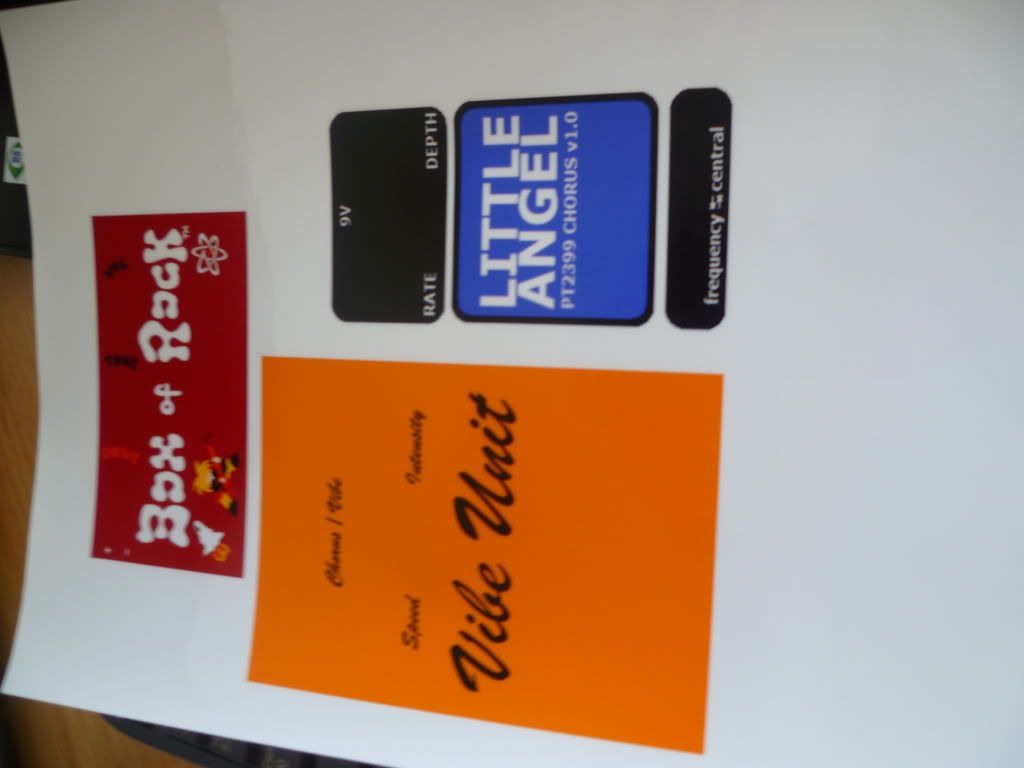
Heres what my recent one looked like fresh out the inkjet:
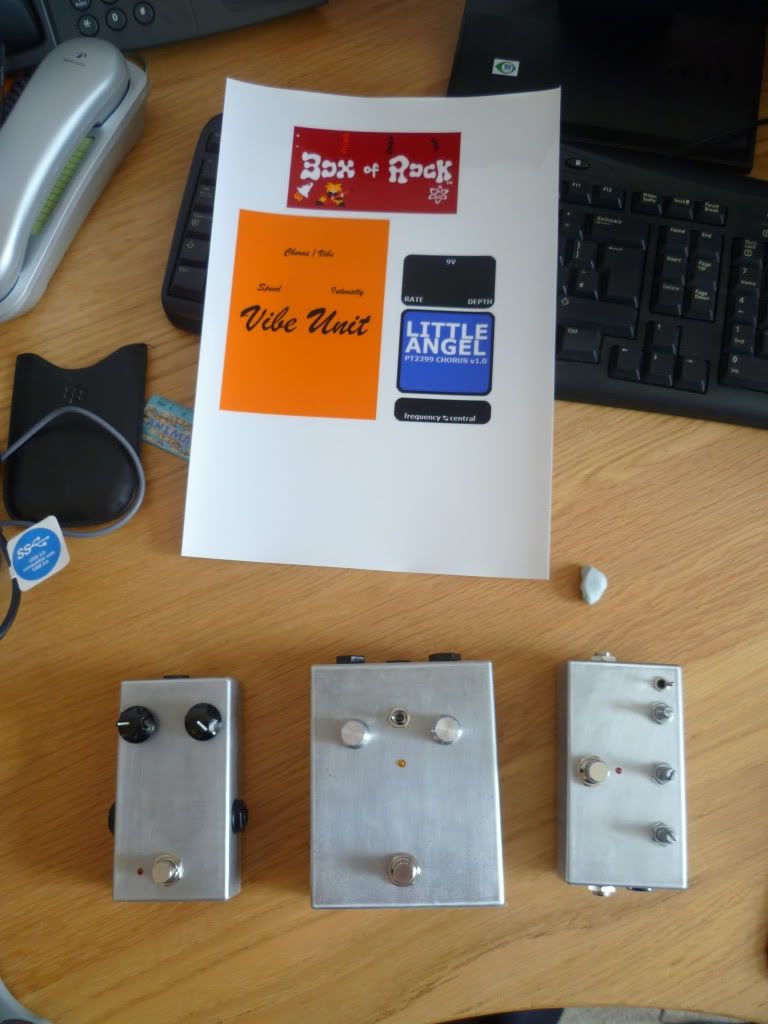
The intended recipients:
Note, the boxes are mildly "prepped" by wet sanding with very fine wet/dry sandpaper, then cleaned with nail polish remover. This prep is done before they are filled with components and hardware. Obviously, this would all be better if you were to apply the decals beforehand, but I do it like this for 2 reasons:
1 - the decal sheets are costly, so doing one at a time as you build a pedal is silly.
2 - I am impatient, and I like to play with my effects before I complete them !
Right, so the thing is printed, now you need to apply it. So its a case of gutting your device. If like me you have used the type of 2.1mm DC jacks that are basically made so you have to unsolder them to remove them, you will have a problem. Either unsolder (no thanks! lol) or have the guts floating around. A good way round this is to take a matching fresh die cast case, and make a sandwich of two boxes to float your guts in, so to speak, and wrap shut with masking tape... like this:

After carefully sticking down the decal, I use some Plasti-Kote spray clear acrylic. A couple of coats is enough with 10 mins drying in between. After this is dry fully, use a craft knife to gouge out the holes for the footswitch and pots. If you use a simple hole for the LED like I do, depending on the LED colour and decal colour, you can simply leave the plastic over the hole. Depends really.
Finally its a case of boxing up the pedal again. Be careful when screwing down parts as your wrench can damage the plasti-kote (so easy to do, grrr). Otherwise its plain sailing to sexy looking pedals! So much nicer for the sake of a couple quid than plain old metal boxes, and much less hassle and time consumption than spray painting (especially if like me you live in an apartment building).
Here is my "gang" all since starting properly at the beginning of the year.
Thanks again to Melx, IvIark and their blogs (see my links) for the help, inspiration, advice and parts(!) and the anonymous users of FSB, DIY and other blogs and places on the web.

If I can be of any help to people reading this then post up a comment.
Cheers!
Hi , This is Stu from Dorset UK , I have finished a few effect pedals , and I really would like to do the same thing as your self , applying the Decal. But I don't know where to start, I mean which site I have to go to for the decal. Please Help StuartJ.
ReplyDeleteHi, The BOX of Rock schematic you have on your page with the added toggle , is it ok for me to build . Or are there more components to add. Thanks Stu.
ReplyDeleteRE: decals just any good print shop eg staples should have printable adhensive backed paper.
ReplyDeleteRE: the box of rock, it was like 6 years ago but it worked for me...YMMV. what you see is what I built. GL;HF