I recently purchased a Dirtbag board from Madbean on which to build one of the most venerable delays ever crafted, the Electro Harmonix Deluxe Memory Man.
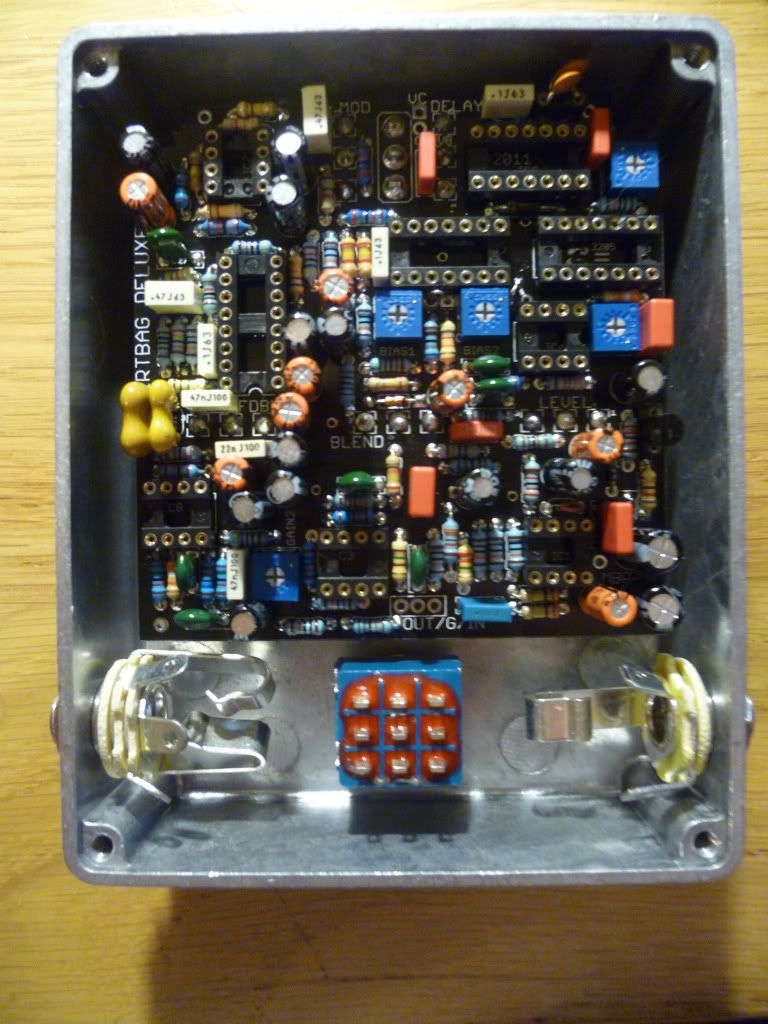
First up here is the populated board
Its a pretty serious build. I didnt read the manual properly (skim) before starting, but thanks to experience I populated the board exactly as described in the BOM, so it does work and everything can fit.
Resistors first - 1/4W 1% metal film mostly, 5% carbon for odd values. I used my multimeter to verify where it was important (5.6K for example).
Then the diodes, and the trimmers. Diodes, easy, trimmers, I recommend Tayda. These ones are exactly to spec size wise for Beans boards, and are ridiculously cheap ($0.16 IIRC). I bought a bunch of each value for future use.
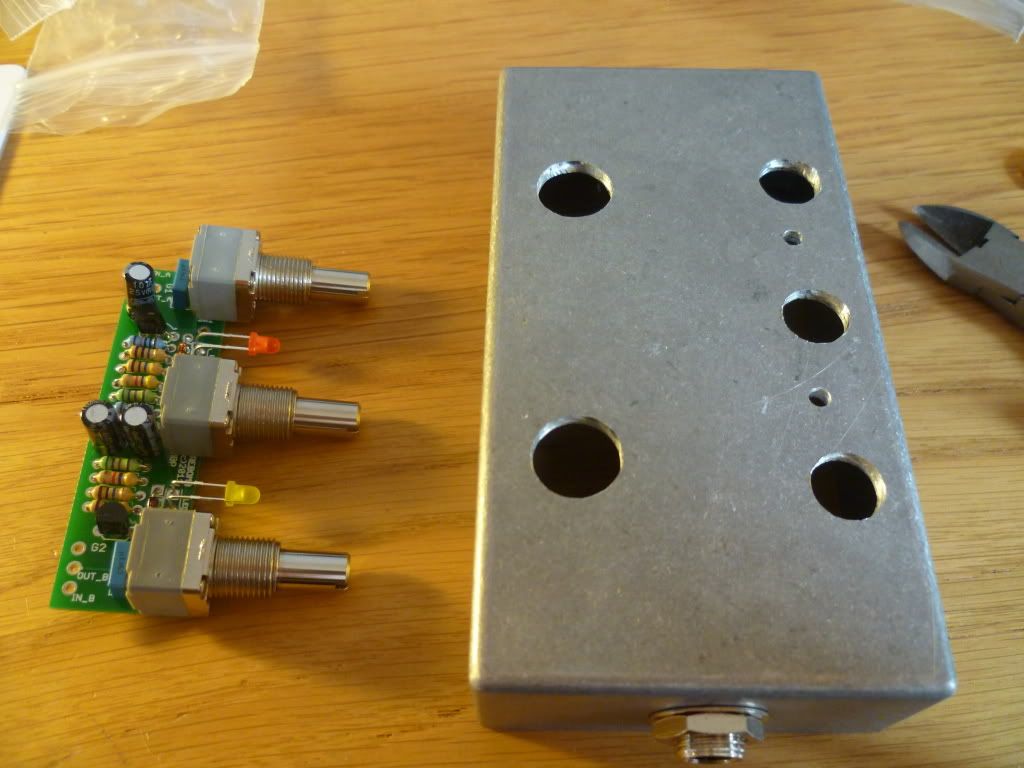
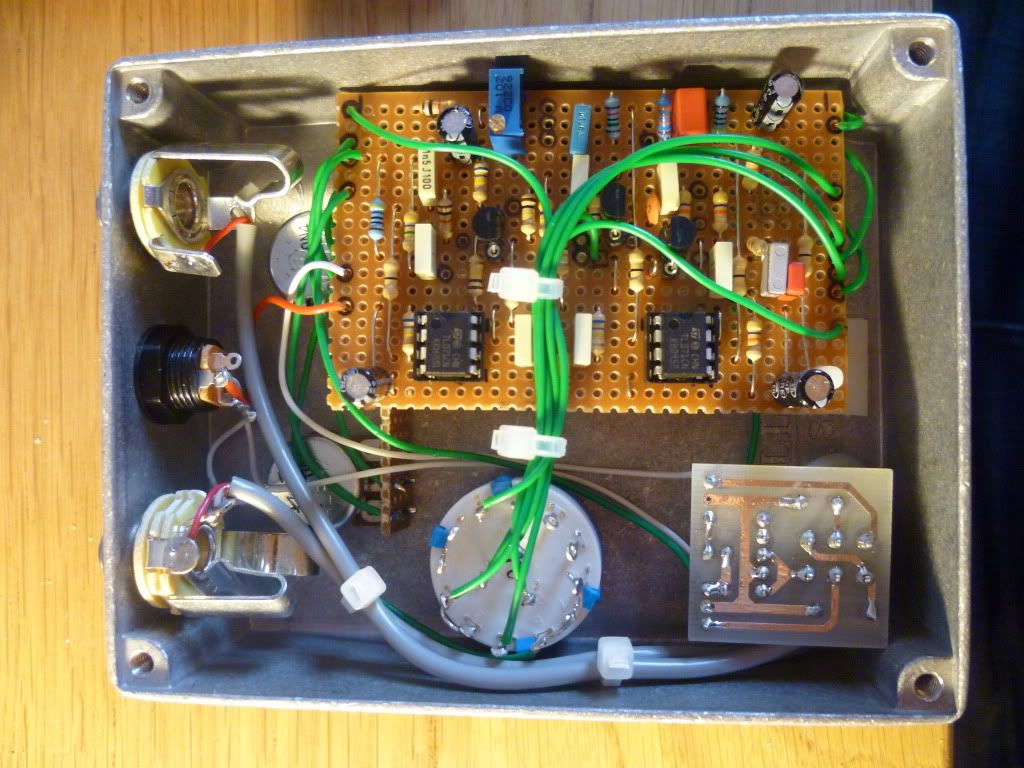
After that, the sockets. I prefer the gold contact turned variety, but the standard ones are fine. Bear in mind the gaps with some of the resistors/capacitors is touch and go (see around IC for a good example) so take care with positioning. I seem to recall R8 and R60 being in the way a bit. Also, C34 and C40 can stop the IC being inserted fully, so watch out for that when socketing.
After all this I added my pots and switch.
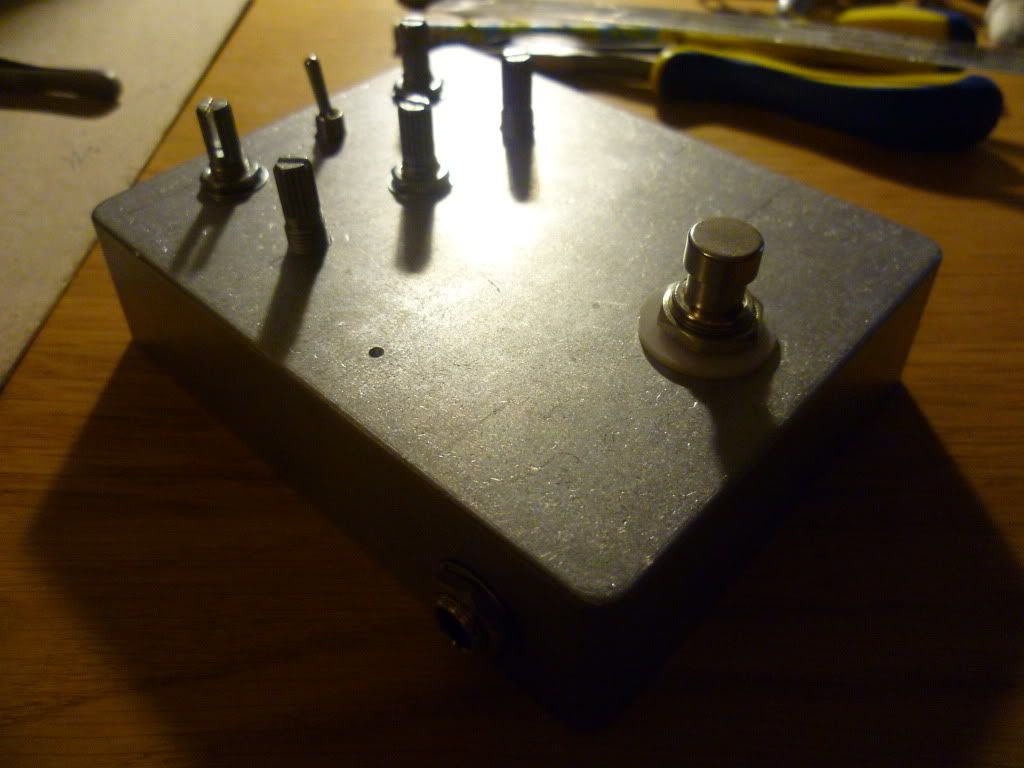
Concurrently, I was marking and drilling the box. The culmination of which is this:
I drilled a pilot hole for the Overload LED directly (ish) above the point of the board. I used a SIL socket on the rear of the board to for the LED connection. I was pretty confident, but doesnt hurt to then check everything fits in your enclosure. I used a 1590BB from Tayda (nice quality, $5) as per the BOM.
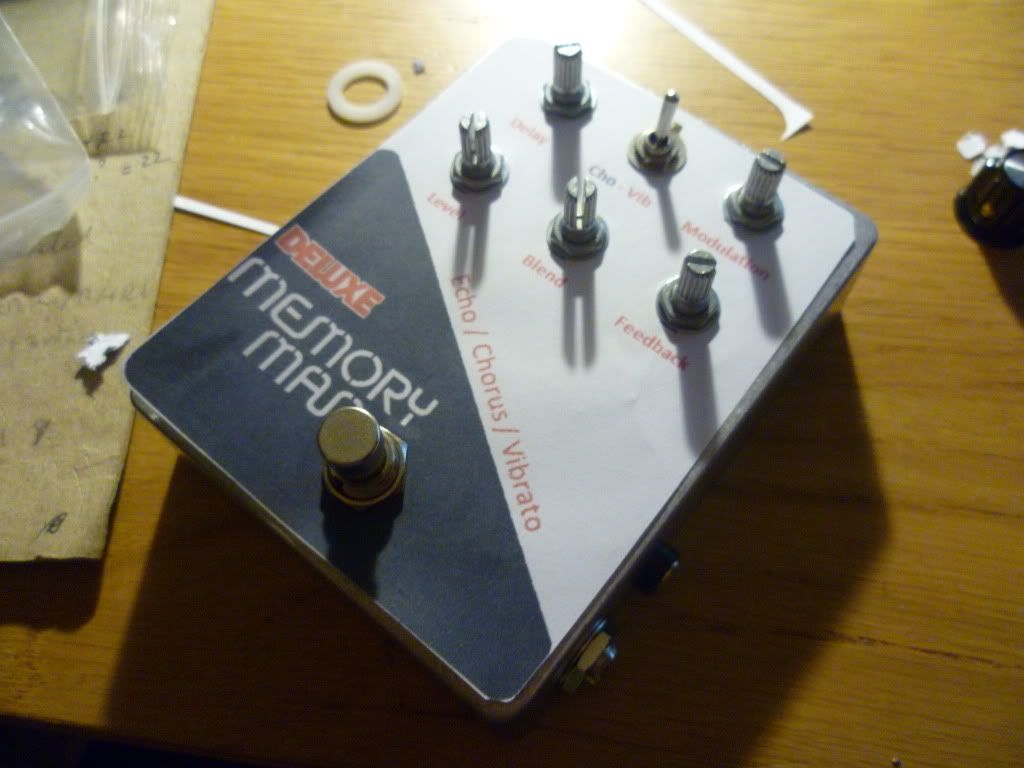
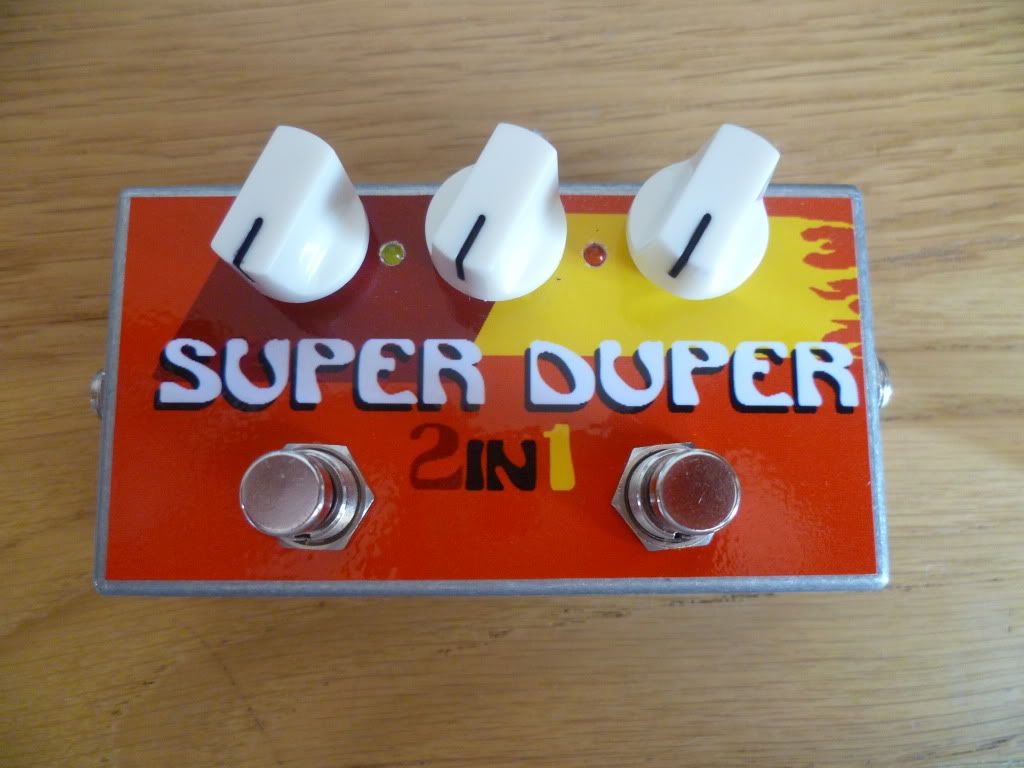
I found some time to start work on a decal now the box was drilled, and unashamedly went with a rip off of the original design. I love the 70s/80s EH designs, so why change a winning formula. Here is the prototype on paper.
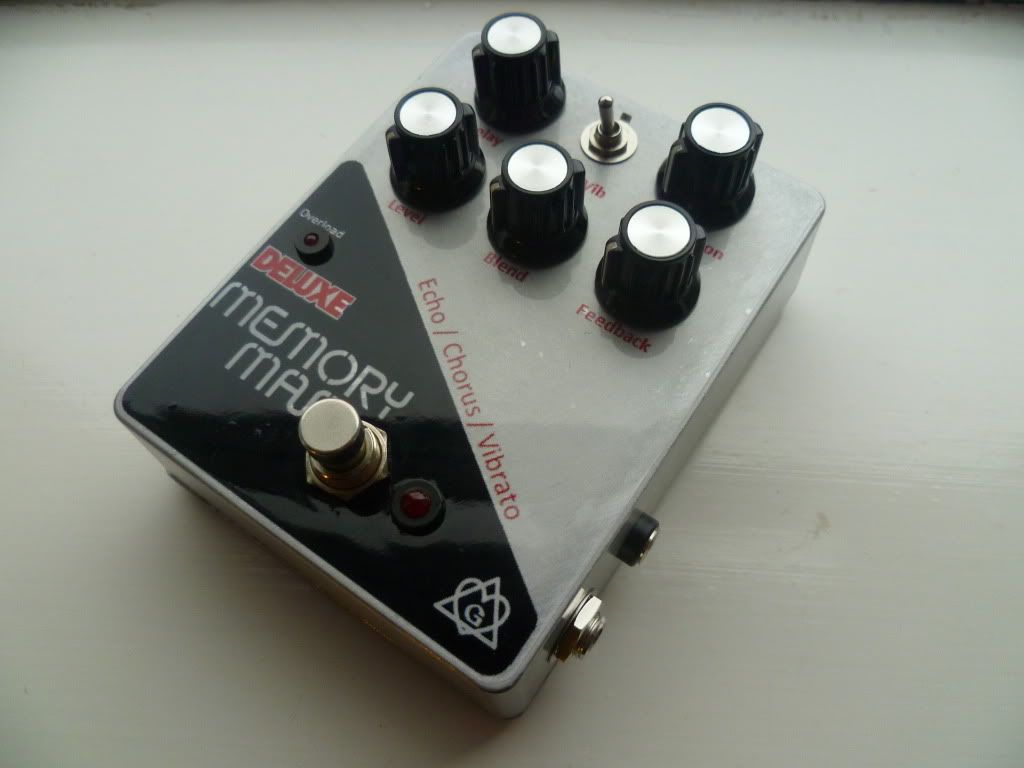
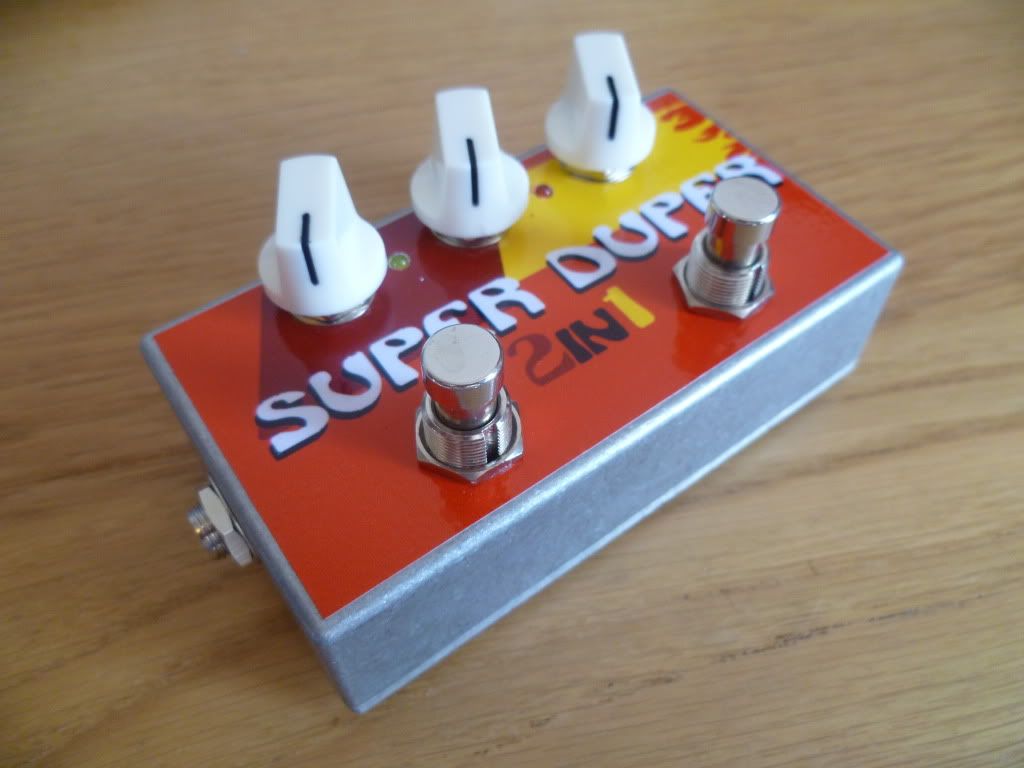
Afterwards I set about finalising this and making up the real decal. I use Inkjet Vinyl self adhesives, and clearcoat with automotive clear spray (3 coats). I sanded the box roughly at an 45 degree angle to simulate a brushed aluminium effect of the big trapezoid EH boxes. I think it looks nice.
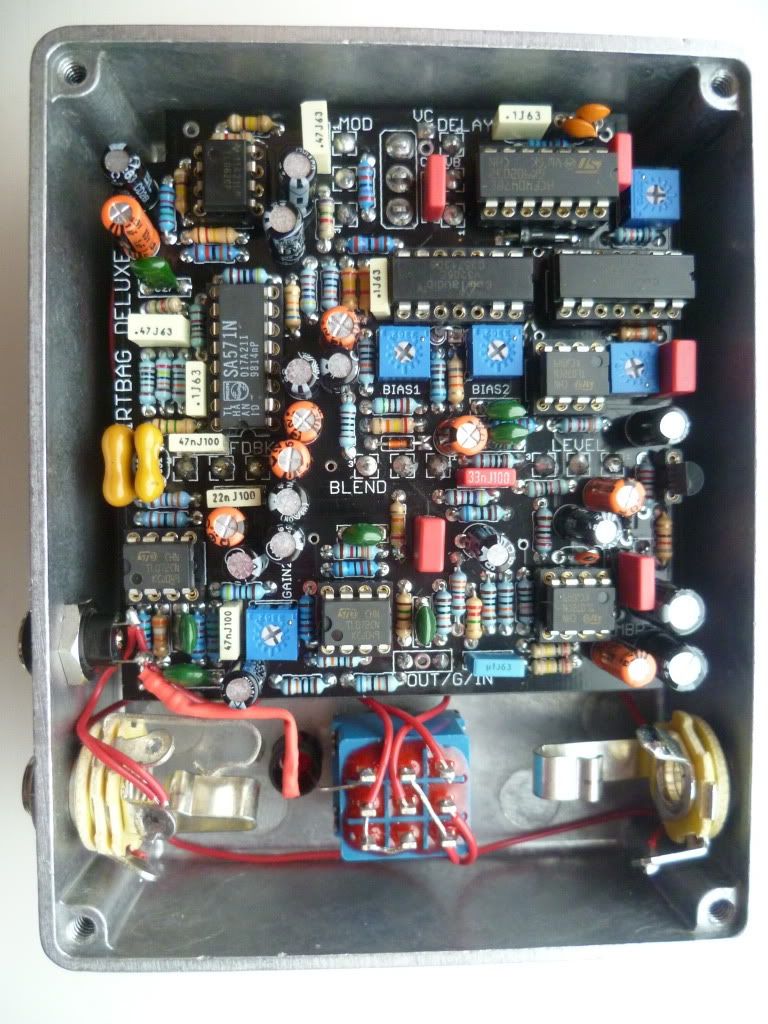
Then came wiring up and testing outside the box. For those who follow the thread in Tech, this was time consuming and worrying, but eventually I am at the stage now where I have almost clean delays. Lessons learnt - socket all your ICs firmly. I didnt change anything than that between testing sessions. At first all I got was noise. Went away, had food, double checked all IC seating, and bam, some delay was coming through clean(ish).
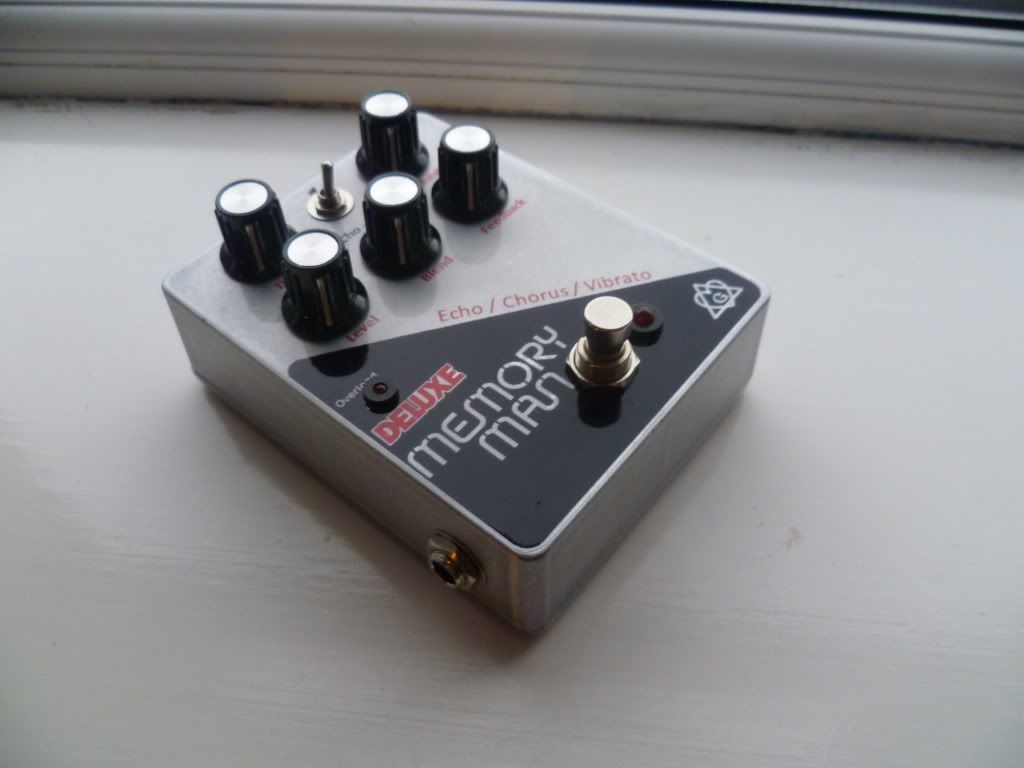
Anyway, this leads us to boxing-post-rocking. I used a 3mm red diffuse LED for the overload, and a 5mm red diffuse for the status, mounted in tayda holders. Hole sizes are 6mm and 8mm for these.
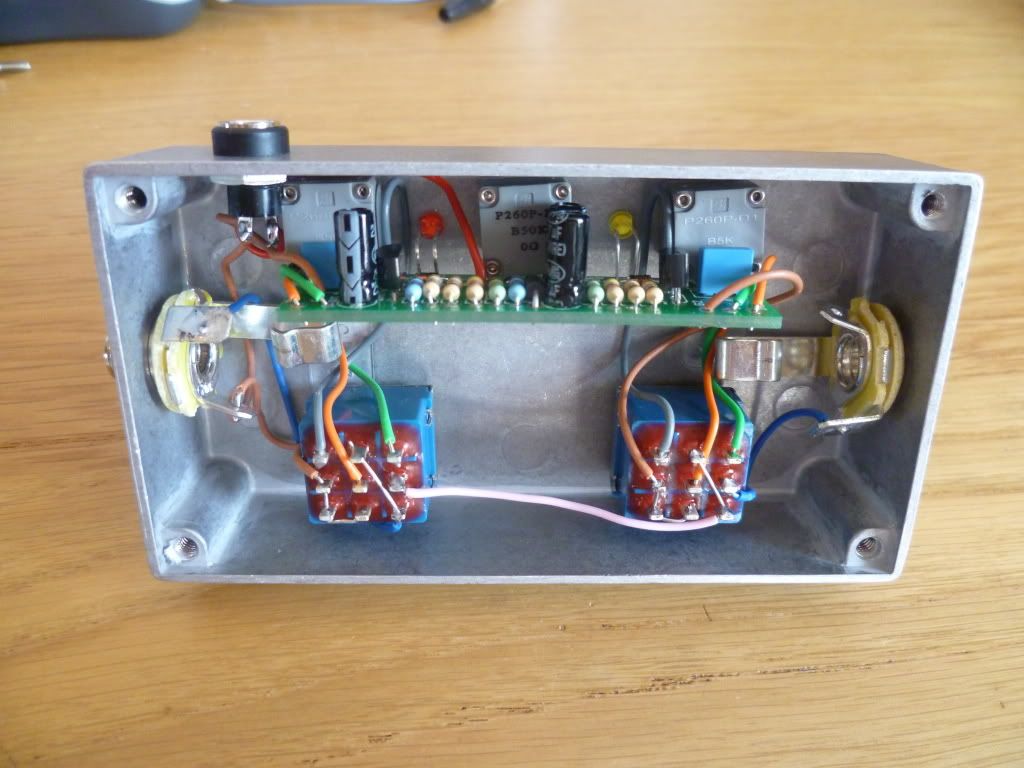
Pretty happy with the wiring job. The Power Jack placement was carefully measured before drilling to ensure clearance. In hindisight it would also been fine at the top centre near the VC connection, but I went with this and its fine. I used nice 8mm DC jacks. Perfect when you wouldnt use a battery anyway.
For the guyshot fans heres another close up
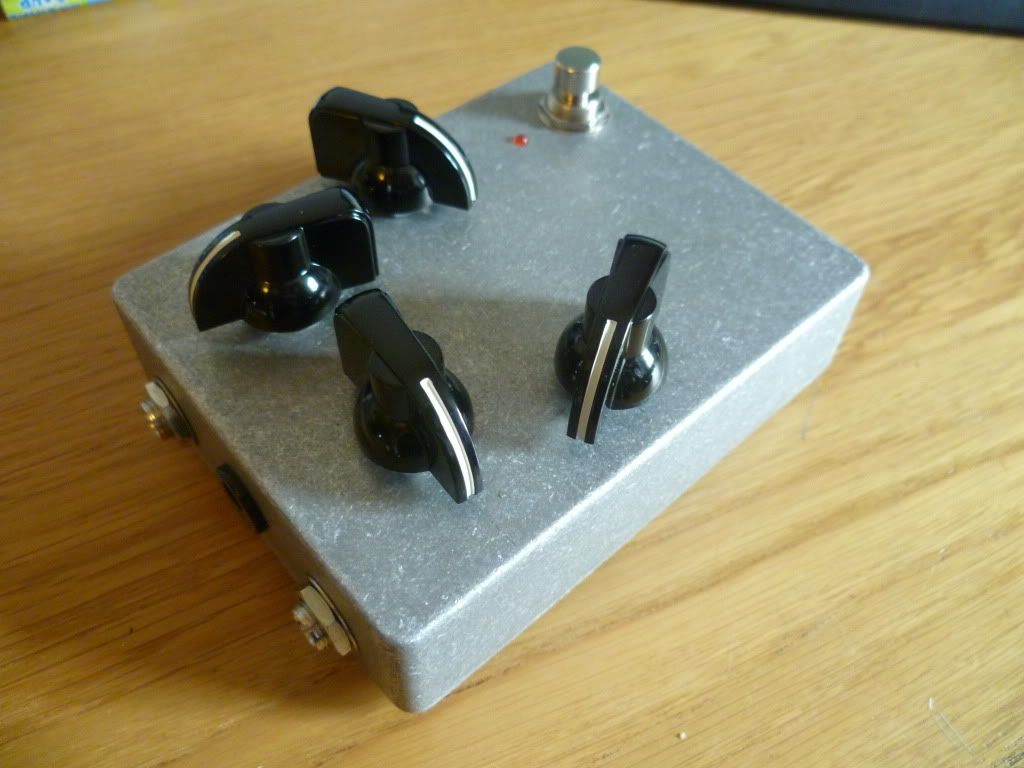
Finally, with the addition of some (in my eyes) lovely knobs, the thing is complete.
Thanks to Bean for the board, Scruffie for the tech help, and all others involved.
One hell of a project. Now to tweak and tweak and tweak those trimmers....
;DLS
This is a blog following my misdemeanours in the field of DIY guitar effects pedal building.
Thursday, 8 December 2011
Tuesday, 27 September 2011
Ive been busy...part 2 - Lovetone Clones strike again!
I've been busy. Busy for weeks and weeks. As well as the aforementioned Commissions I have also been endulging my biggest pedal building passion - Lovetone! People reading this blog know just how much I love the big colourful British wonders. Im lucky to have a well paid job, but even as it stands I cant justify what real Lovetones command on the used market. So, its cloning that we can do, for reasonable money.
First up I have to give massive props to Taylor over at musicpcb.com.
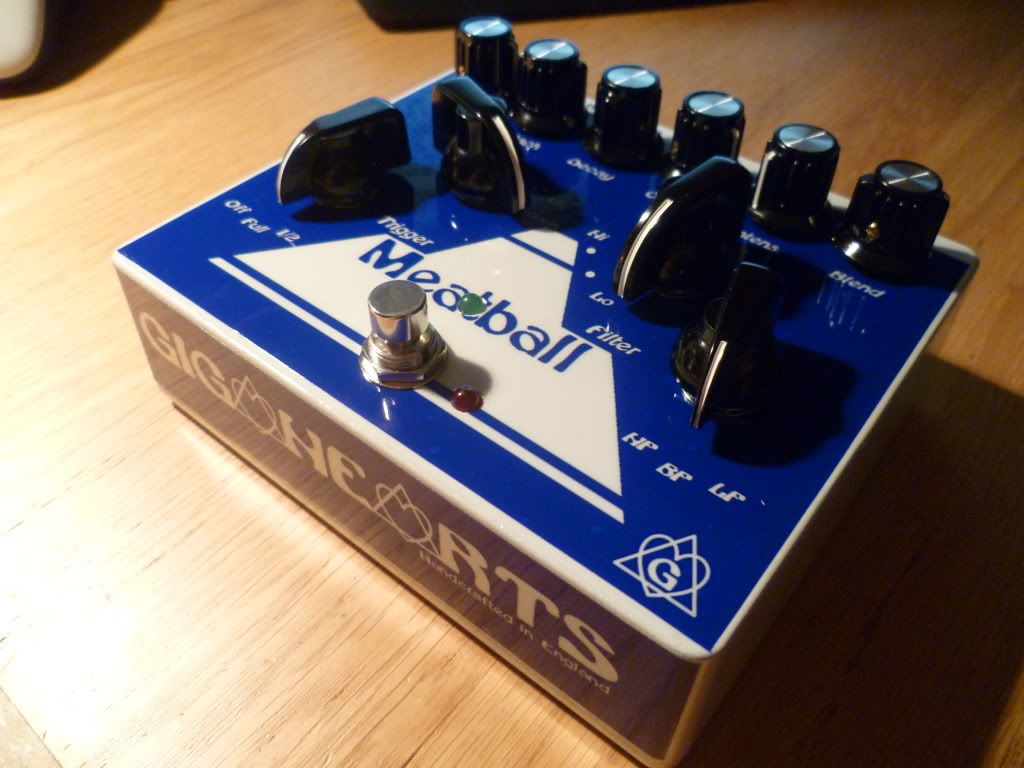
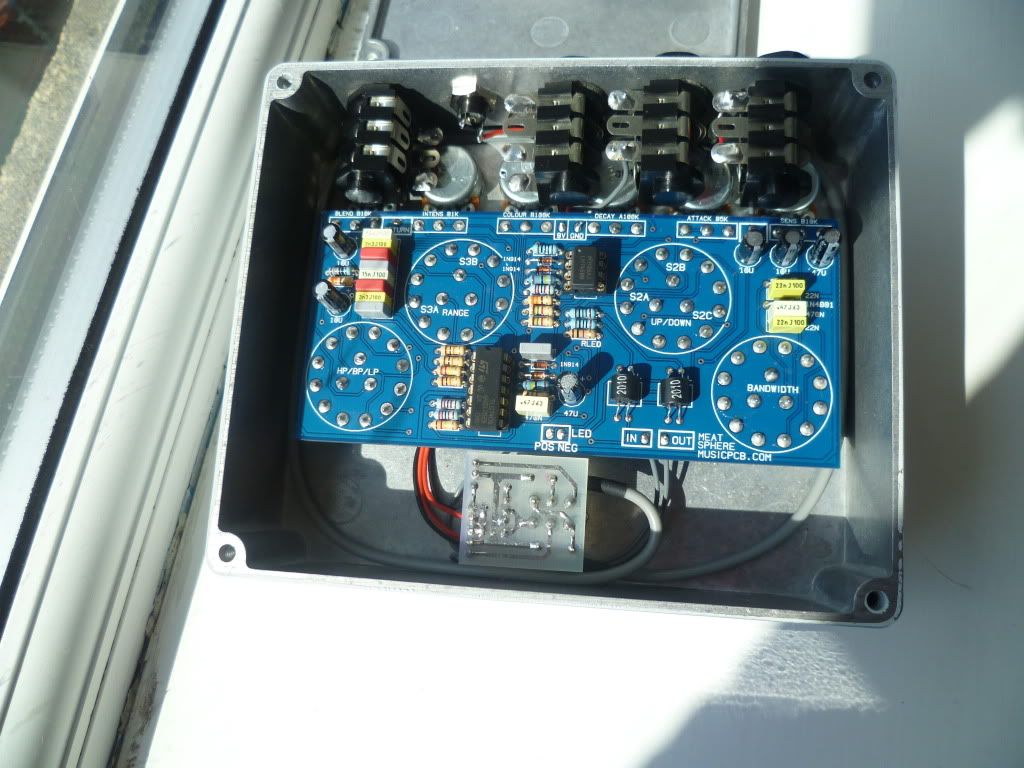
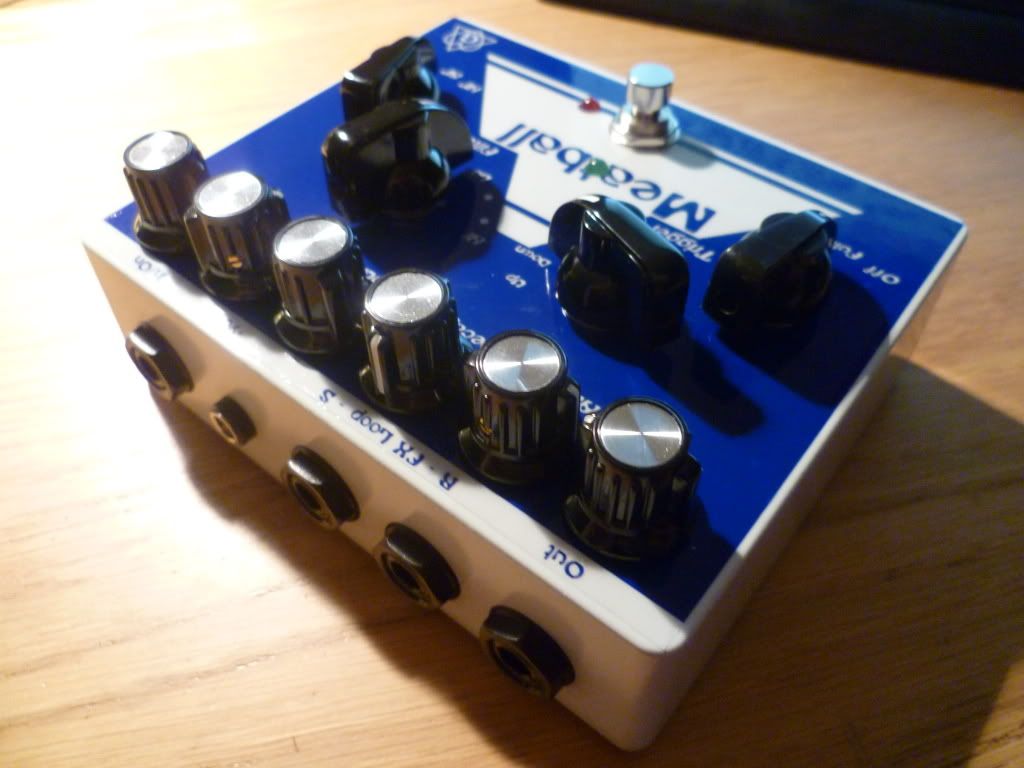
The Meatball is one of the most sought after envlope followers / triggered filters on the market. Originally a take on the classic Mutron 3 with some extra bits (notably pedal controls and an effects loops) the Lovetone Meatball is a big blue barrell of fun and commands about £500+ on the used market. Apart from the Big Cheese, the Meatball (anecdotally, I dont have figures) is the longest produced and therefore most frequently available pedal. Many people have worked on clones. Most notable was the McMeat project, but this required all pots switches and jacks offboard wired. this is a massive undertaking with the 4 x 3P4T rotary switches involved. So where does Taylor come in? He has made a project that is basically the Meatball, with onboard pots and rotaries, for $17 in a sexy blue double sided professional PCB, with full build instructions. It fits in a Hammond 1590BBDD enclosure, and there is even a drill template. Therefore, for around £50, you can make your very own Meatball. Absolutely amazing. My lovely girlfriend bought me all the parts for my birthday, and I set about making my replica.
Here are the pics:
Those familiar with the original will note that the pedal controls are omitted. Its a fickle beast and very hard to dial in but you can get some sweet and varied filter sweep sounds. It is also really cool with a Fuzz in the loop.
Next up for this Lovetone clone journey is something scary. Big and scary. So big and scary its been sat in my to do draw half finished for about 4 months. Let me tell the whole story....
About 6 months ago while I was still very much a noob (in some respects of course I still am) I realised that perhaps one day, just perhaps, I might be able to make a Lovetone workalike. So I went off on the net to read about them. I found a project for a Ring Stinger workalike, called the String Ringer. Obviously, this requires a PCB to be fabricated, not something I am still set up for, choosing Vero for the most part. Fast forward a few months, and I decided it was time to try this.
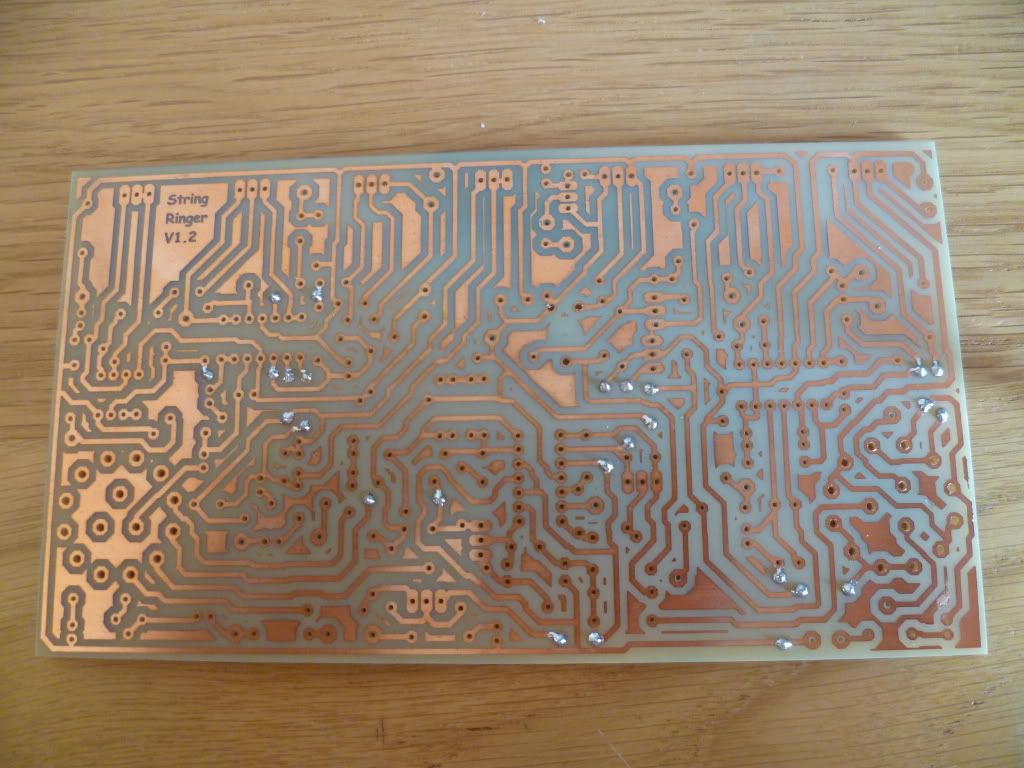
I got Barry over at GuitarPCB.com to agree to etch the boards for me. There are two boards with the Ring Stinger, the massive main board, and a daughter board for the Germanium diodes and transformers. He charged an extremely reasonable amount, I think I recall it was $70 or $80 for two sets. When you consider typically 2 square inch PCBs are sold for about $10-12 per peice, this is looking a real good purchase.
So, this was somewhat easy. Next was sourcing all the components. I wanted to go as close to the original device as possible, and to enable onboard pots, this meant sourcing Bournes 91 potentiometers. Damn. These are fairly hard to find. Eventually I had to settle for all linear 100k pots (the schematic calls for all 100k pots, but a couple should be audio taper if we are splitting hairs). I got them from Farnell, and bought enough to make the two complete pedals to make it even vaguely economical. In numbers less than 10, these are over £4 each (!)
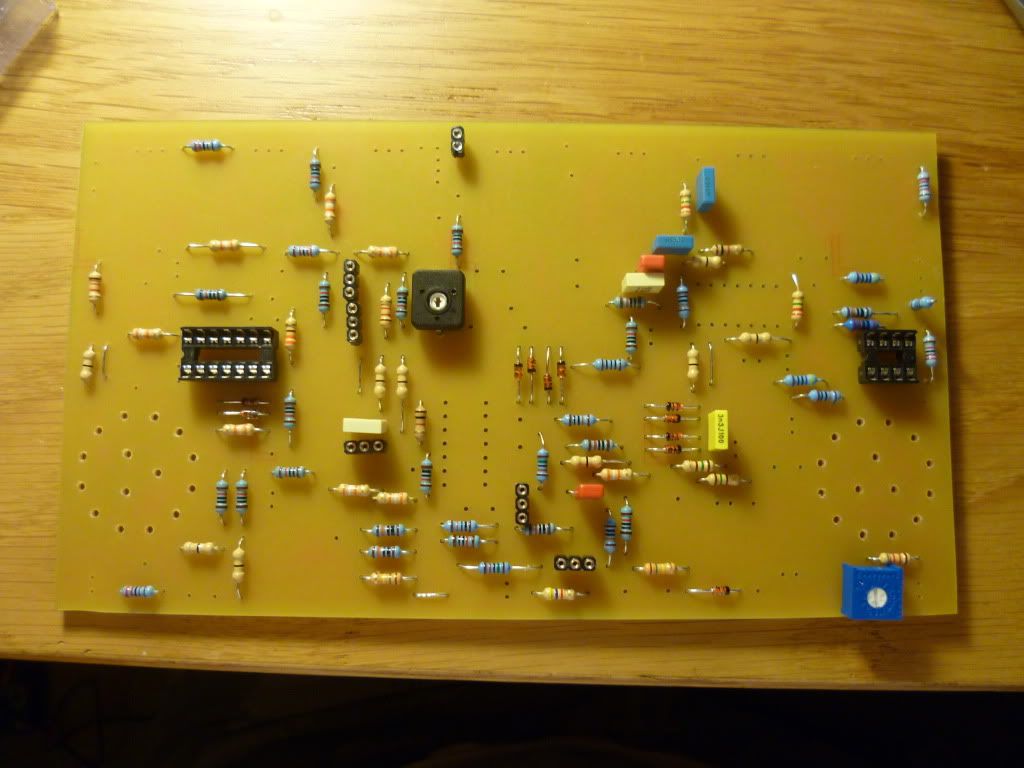
Next up was a suprise. The suprise was the utility of Maplins. Beleive it or not, Maplins stock not only the correct potentiometer knobs as used on the real deal (£1.09 each), but also the LT-44 transformers used in the stock unit. Perfect! I will never slight Maplins again (lie). Great. Everything else was fairly commonplace bar some wierd transistor used for polarity protection, some odd resistor and cap values, and a 15v zener diode. You can read the BOM in the document here: http://homepage.ntlworld.com/paul.nelson666/StringRingerv12r.pdf Its fairly vast. The main board took me about 6 hours to populate. There are tons and tons of resistors and capacitors. The ICs are common TL074 and NE5532 opamps. Rotaries can be Lorlin or Alpha enclosed plastic types.
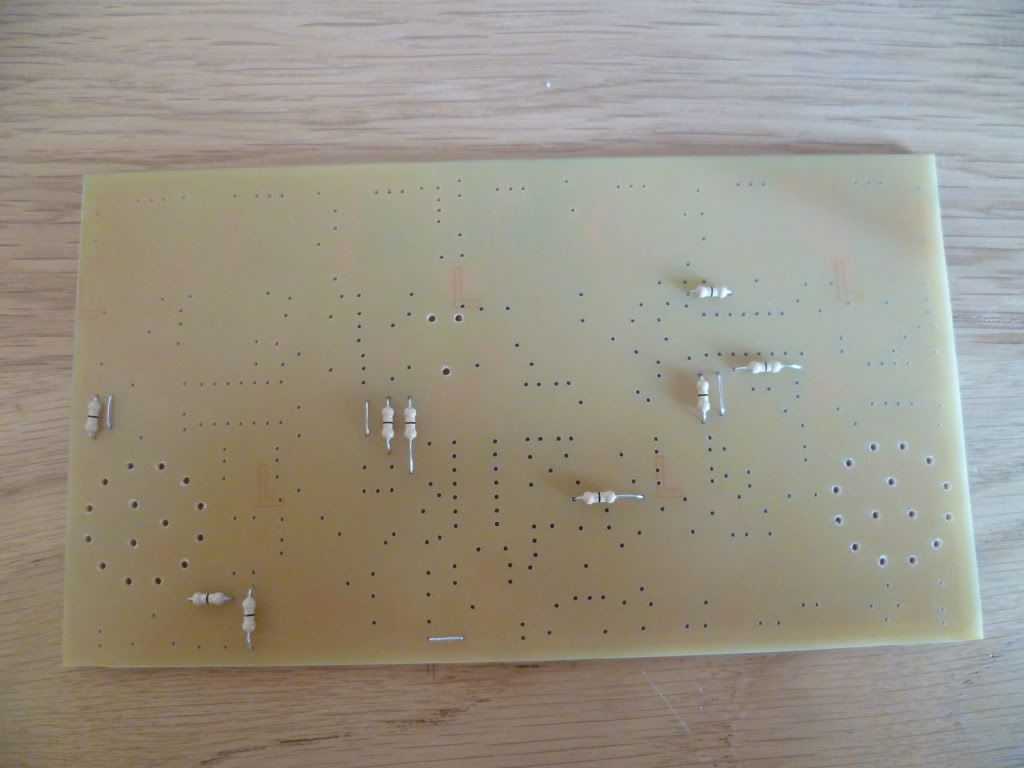
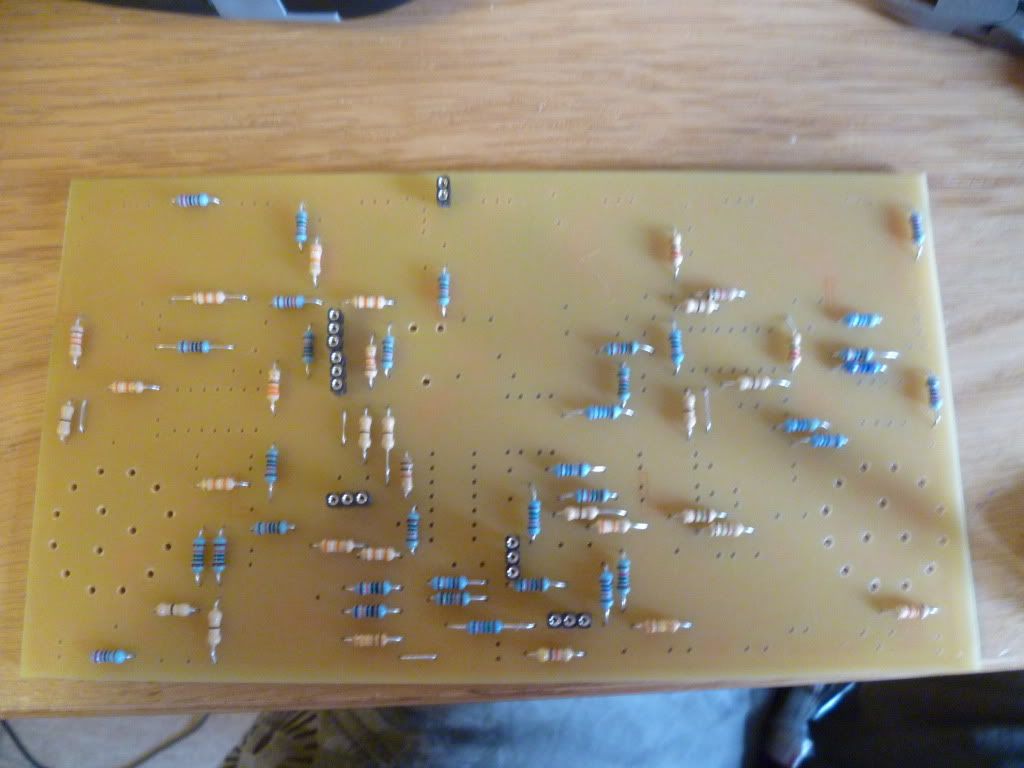
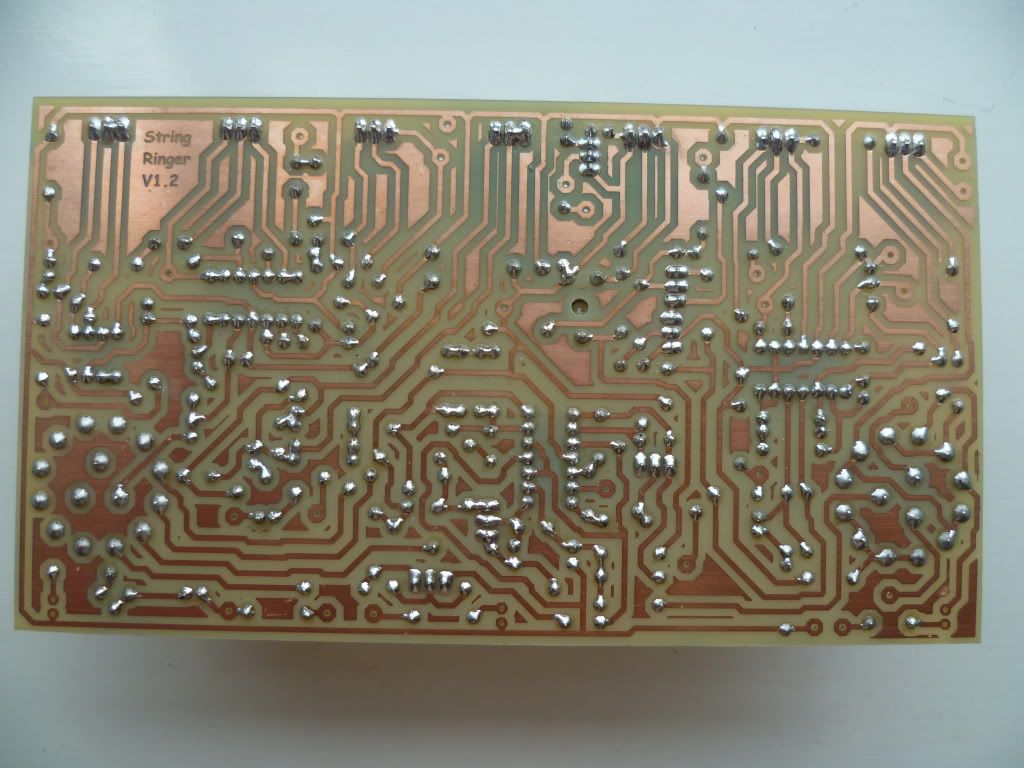
Here are a series of pictures I took while populating the main board. Note, where appropriate, I used Lovetone style 0ohm jumpers :)
I had to drill out the holes on the rotary's and for the VCO trimpot. Everything else was done by Barry.
Adding jumpers
Adding resistors and transistor sockets
Note the socket at the top middle. The schematic calls for a resistor 100k - 1M. I ended up using 100k, but socket seemed pragmatic...
Adding some IC sockets caps and trimmers
You can see we went from working by daylight to needing a lamp on. I was keen to make the soldering as neat as possible so really took my time, given the up front investment in the project.
This next pic shows the fully populated main and daughter board
The daughter board consists of two LT-44 transformers, a resistor, trimmer and 4 matched germanium diodes. I matched them by forward voltage using a DMM. This is required to make the pedal sounds its best and minise carrier bleed. I bought 10 diodes and had one really good matched quartet, one good matched quartet, and a couple oddballs which will be used for other projects where matching isnt required. These peices are also quite expensive, added to the fact you need to buy in bigger numbers to get a set. Well worth the time effort and cash though I beleive.
Here is a nice pic of many fruitful hours with soldering iron in hand. I think its pretty neat if I do say so myself!
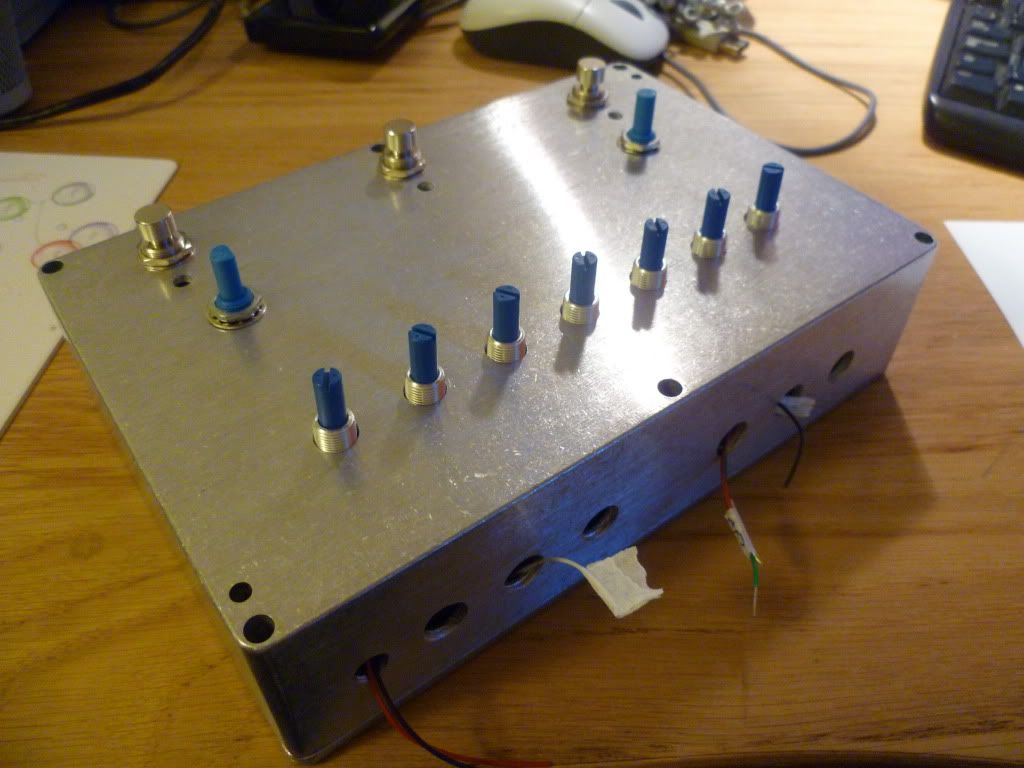
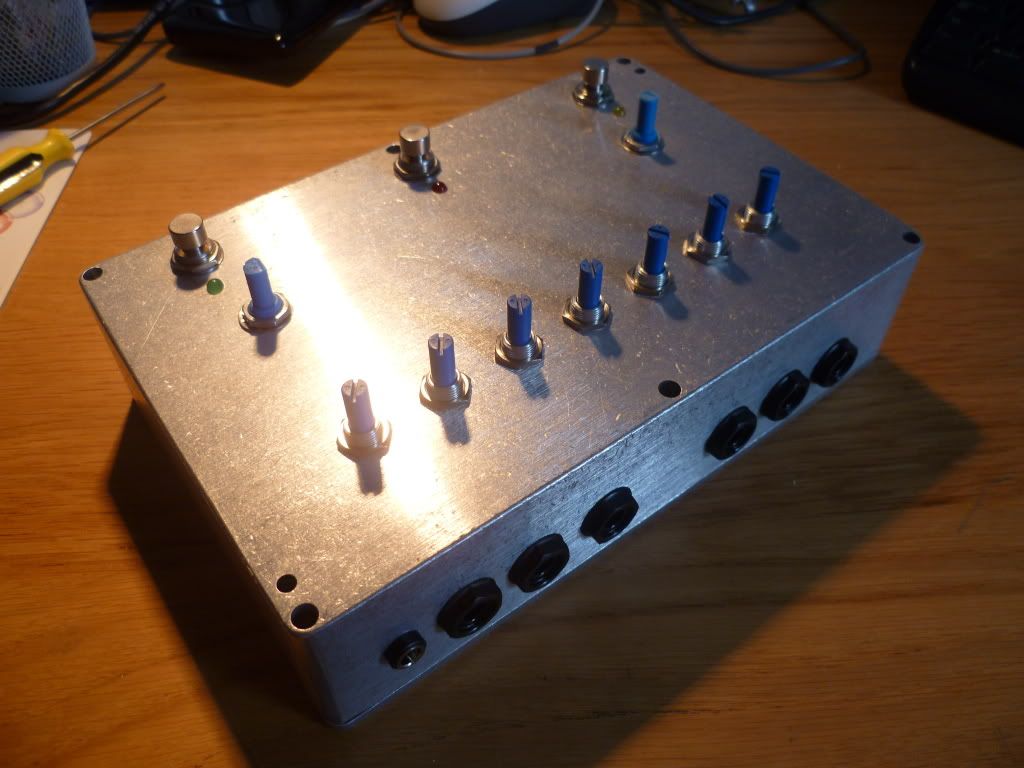
Onto the enclosure. This took a loooong time to source. Many good quality big enclosures out there. Sadly, none of them are big enough. This is a 220 x 145 x 50 box I ended up with. £13 from Rapid. Only negatives are its an IP65 box so has drilling mount holes in it. Wont be a problem when I get round to decal-isation :D
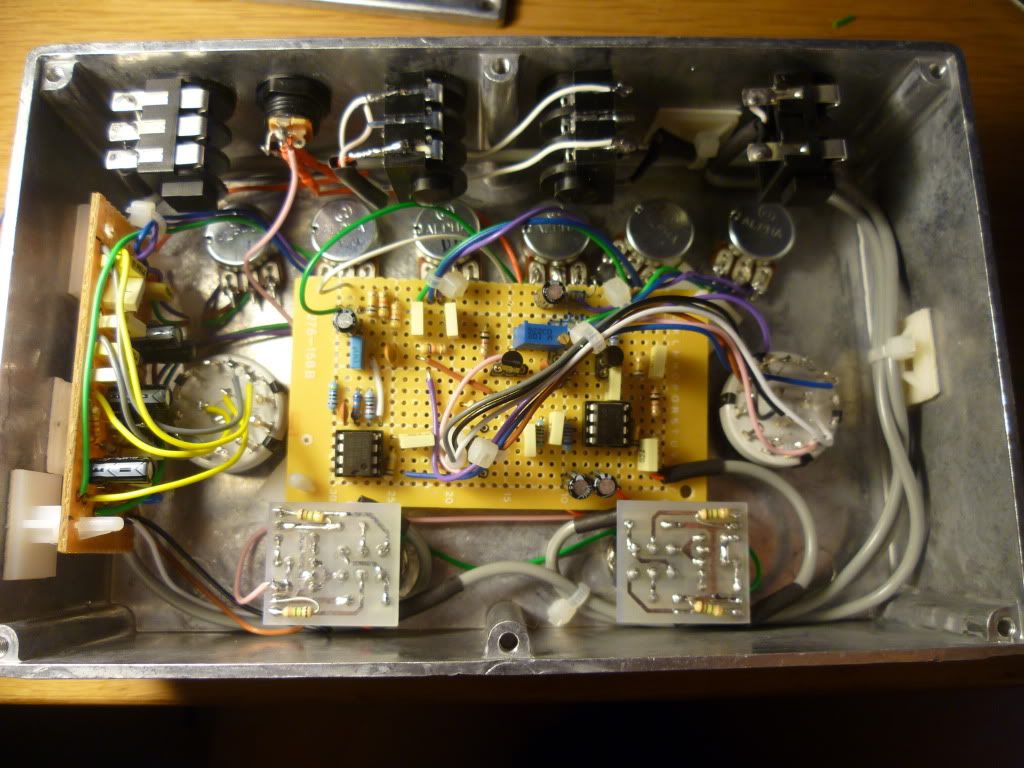
Here is a pic of the drilled enclosure, with most of the parts in, part way through wiring. I used Barrys best hookup wire for all non-shielded duties. Much better than single core for a project like this. When finished I cable tied everything in place. Having some flexibility in the wire really helps, and prevents worries of breakage when you need to be moving and fitting things in place as you go.
Next pic I took was at a state of completion of the internals, outside the box. Going from the stuffed PCBs to this point was a LOT of work and dedication. I kinda got in a zone and worked through it all in one sitting. Probably 6+ hours work. I didnt count. I just wanted to get it done. Even with on board pots and switches, this shows just how much wiring is involved, including some big jumpers on the board. NOT a trivial task by any stretch.
So nearing the final hurdle of a functioning Ring Stinger!
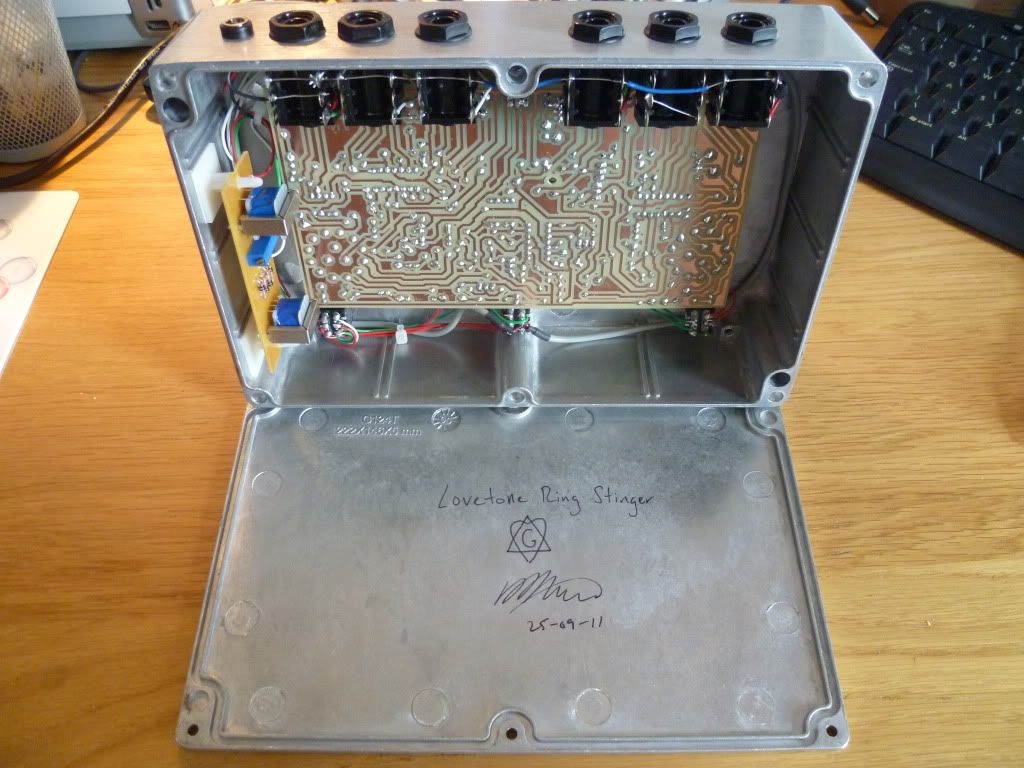
This is the "everything in" shot.
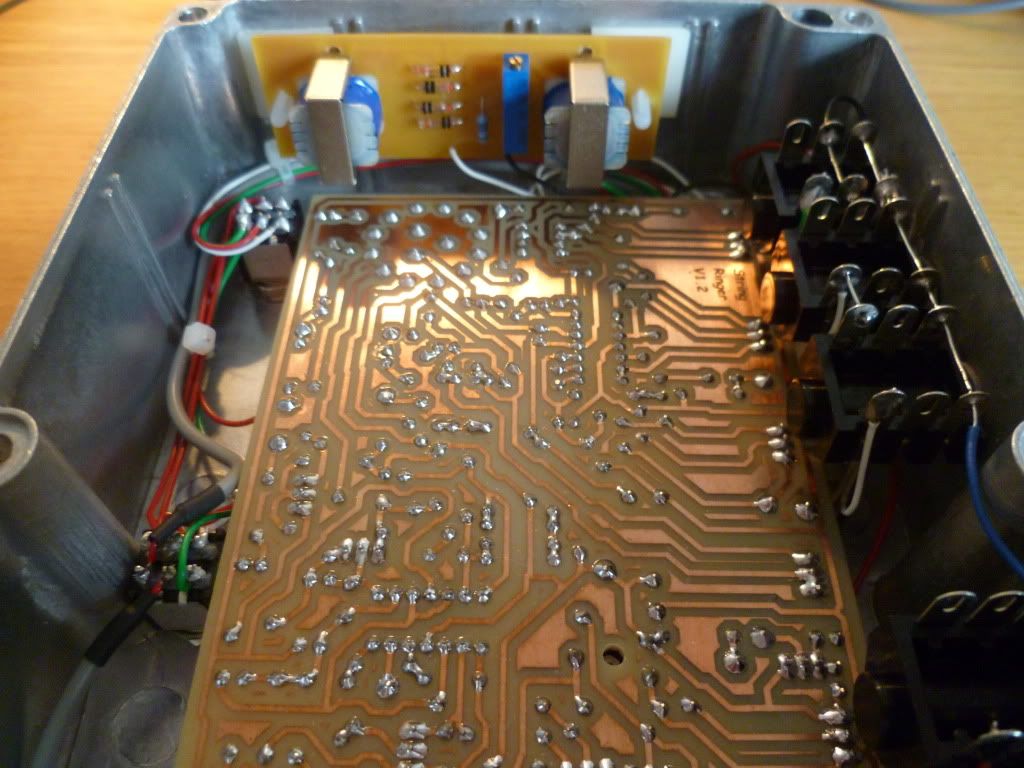
And internals. Daughter board is mounted on self adhesive nylon standoffs. Perfectly robust. Switches are Alpha DPDT, really nice reliable ones. Jacks are all Cliff UK switching jacks, as used in the real deal. Not cheap, but definitely nice examples.
Note the grounding wire, it intentionally is not wired to one of the jacks as per Lovetone instructions and of course the build document. Even in this mammoth encolosure its a tight squeeze (!)
Detail shot:
Signed by yours truly
The nearly-finished article.
To do list: Decal, and get one more knob from Maplins. They only ever have a couple in stock, and I cba buying online with £3 postage. Ill get one next time Im up at the retail park where my local store is. Decal will likely be the Lovetone original like my Meatball. Im unashamed in doing so, as its for personal use, and I just plain like the Lovetone aesthetics.
Ive recorded a couple of videos. The first below is a teaser. Ill be back with a longer one when I have time to edit and upload it, towards the end of the week.
Longer demo now up!
Excuse me in general (playing, presentation, camera skills, sound)
Look forward to my next blog when I will be talking about my little venture (well, its pretty much just a brand name for now) www.gigahearts.co.uk for a taster, I'll be back with the full story.
First up I have to give massive props to Taylor over at musicpcb.com.
The Meatball is one of the most sought after envlope followers / triggered filters on the market. Originally a take on the classic Mutron 3 with some extra bits (notably pedal controls and an effects loops) the Lovetone Meatball is a big blue barrell of fun and commands about £500+ on the used market. Apart from the Big Cheese, the Meatball (anecdotally, I dont have figures) is the longest produced and therefore most frequently available pedal. Many people have worked on clones. Most notable was the McMeat project, but this required all pots switches and jacks offboard wired. this is a massive undertaking with the 4 x 3P4T rotary switches involved. So where does Taylor come in? He has made a project that is basically the Meatball, with onboard pots and rotaries, for $17 in a sexy blue double sided professional PCB, with full build instructions. It fits in a Hammond 1590BBDD enclosure, and there is even a drill template. Therefore, for around £50, you can make your very own Meatball. Absolutely amazing. My lovely girlfriend bought me all the parts for my birthday, and I set about making my replica.
Here are the pics:
Those familiar with the original will note that the pedal controls are omitted. Its a fickle beast and very hard to dial in but you can get some sweet and varied filter sweep sounds. It is also really cool with a Fuzz in the loop.
Next up for this Lovetone clone journey is something scary. Big and scary. So big and scary its been sat in my to do draw half finished for about 4 months. Let me tell the whole story....
About 6 months ago while I was still very much a noob (in some respects of course I still am) I realised that perhaps one day, just perhaps, I might be able to make a Lovetone workalike. So I went off on the net to read about them. I found a project for a Ring Stinger workalike, called the String Ringer. Obviously, this requires a PCB to be fabricated, not something I am still set up for, choosing Vero for the most part. Fast forward a few months, and I decided it was time to try this.
I got Barry over at GuitarPCB.com to agree to etch the boards for me. There are two boards with the Ring Stinger, the massive main board, and a daughter board for the Germanium diodes and transformers. He charged an extremely reasonable amount, I think I recall it was $70 or $80 for two sets. When you consider typically 2 square inch PCBs are sold for about $10-12 per peice, this is looking a real good purchase.
So, this was somewhat easy. Next was sourcing all the components. I wanted to go as close to the original device as possible, and to enable onboard pots, this meant sourcing Bournes 91 potentiometers. Damn. These are fairly hard to find. Eventually I had to settle for all linear 100k pots (the schematic calls for all 100k pots, but a couple should be audio taper if we are splitting hairs). I got them from Farnell, and bought enough to make the two complete pedals to make it even vaguely economical. In numbers less than 10, these are over £4 each (!)
Next up was a suprise. The suprise was the utility of Maplins. Beleive it or not, Maplins stock not only the correct potentiometer knobs as used on the real deal (£1.09 each), but also the LT-44 transformers used in the stock unit. Perfect! I will never slight Maplins again (lie). Great. Everything else was fairly commonplace bar some wierd transistor used for polarity protection, some odd resistor and cap values, and a 15v zener diode. You can read the BOM in the document here: http://homepage.ntlworld.com/paul.nelson666/StringRingerv12r.pdf Its fairly vast. The main board took me about 6 hours to populate. There are tons and tons of resistors and capacitors. The ICs are common TL074 and NE5532 opamps. Rotaries can be Lorlin or Alpha enclosed plastic types.
Here are a series of pictures I took while populating the main board. Note, where appropriate, I used Lovetone style 0ohm jumpers :)
I had to drill out the holes on the rotary's and for the VCO trimpot. Everything else was done by Barry.
Adding jumpers
Note the socket at the top middle. The schematic calls for a resistor 100k - 1M. I ended up using 100k, but socket seemed pragmatic...
Adding some IC sockets caps and trimmers
You can see we went from working by daylight to needing a lamp on. I was keen to make the soldering as neat as possible so really took my time, given the up front investment in the project.
This next pic shows the fully populated main and daughter board
The daughter board consists of two LT-44 transformers, a resistor, trimmer and 4 matched germanium diodes. I matched them by forward voltage using a DMM. This is required to make the pedal sounds its best and minise carrier bleed. I bought 10 diodes and had one really good matched quartet, one good matched quartet, and a couple oddballs which will be used for other projects where matching isnt required. These peices are also quite expensive, added to the fact you need to buy in bigger numbers to get a set. Well worth the time effort and cash though I beleive.
Here is a nice pic of many fruitful hours with soldering iron in hand. I think its pretty neat if I do say so myself!
Onto the enclosure. This took a loooong time to source. Many good quality big enclosures out there. Sadly, none of them are big enough. This is a 220 x 145 x 50 box I ended up with. £13 from Rapid. Only negatives are its an IP65 box so has drilling mount holes in it. Wont be a problem when I get round to decal-isation :D
Here is a pic of the drilled enclosure, with most of the parts in, part way through wiring. I used Barrys best hookup wire for all non-shielded duties. Much better than single core for a project like this. When finished I cable tied everything in place. Having some flexibility in the wire really helps, and prevents worries of breakage when you need to be moving and fitting things in place as you go.
Next pic I took was at a state of completion of the internals, outside the box. Going from the stuffed PCBs to this point was a LOT of work and dedication. I kinda got in a zone and worked through it all in one sitting. Probably 6+ hours work. I didnt count. I just wanted to get it done. Even with on board pots and switches, this shows just how much wiring is involved, including some big jumpers on the board. NOT a trivial task by any stretch.
So nearing the final hurdle of a functioning Ring Stinger!
This is the "everything in" shot.
And internals. Daughter board is mounted on self adhesive nylon standoffs. Perfectly robust. Switches are Alpha DPDT, really nice reliable ones. Jacks are all Cliff UK switching jacks, as used in the real deal. Not cheap, but definitely nice examples.
Note the grounding wire, it intentionally is not wired to one of the jacks as per Lovetone instructions and of course the build document. Even in this mammoth encolosure its a tight squeeze (!)
Detail shot:
Signed by yours truly
The nearly-finished article.
To do list: Decal, and get one more knob from Maplins. They only ever have a couple in stock, and I cba buying online with £3 postage. Ill get one next time Im up at the retail park where my local store is. Decal will likely be the Lovetone original like my Meatball. Im unashamed in doing so, as its for personal use, and I just plain like the Lovetone aesthetics.
Ive recorded a couple of videos. The first below is a teaser. Ill be back with a longer one when I have time to edit and upload it, towards the end of the week.
Longer demo now up!
Excuse me in general (playing, presentation, camera skills, sound)
Look forward to my next blog when I will be talking about my little venture (well, its pretty much just a brand name for now) www.gigahearts.co.uk for a taster, I'll be back with the full story.
Monday, 26 September 2011
Ive been busy...part 1
Damn its been too long. I got reminded recently that people still read this blog. Really genuinely lovely to hear that, and also that people are finding it a good read, which is important too. Not just reading it to laugh at my efforts making effects pedals.
So what have I been up to you ask? First up, I have been doing some more custom work for nice people.
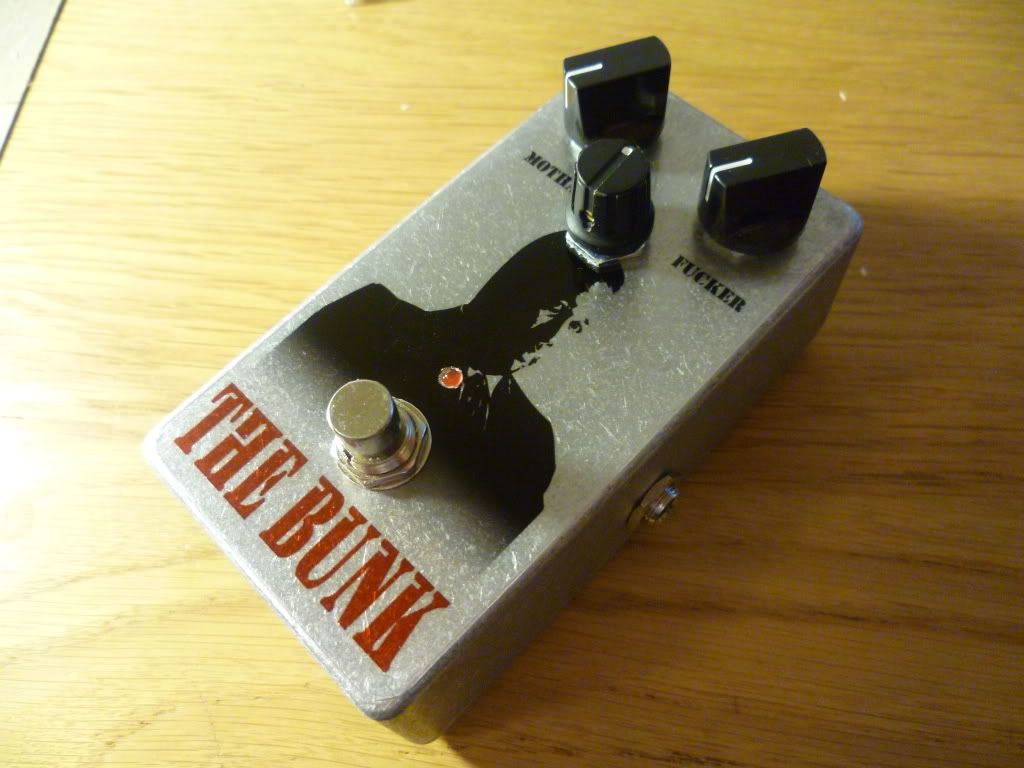
Firstly, I finished a Tone Bender style fuzz for a guy in a band called Modern Alarms. www.myspace.com/modernalarms I think. Check them out. Anyway, he wanted a fuzz pedal to cut thru a mix, and with 2 or 3 knobs. Knowing a tone knob would be vital, we settled on three. In the end I prototyped 3 circuits for this, the first two just werent doing the business for me. He wanted a fuzz that could be subtle but also go all out carnage. Fuzz Faces were tried. Some silicon tone bender variants were tried. In the end I settled on some tweaks to a Silicon TB design found at Freestompboxes. The guy wanted something with a guy called "The Bunk" on it, and the controls to say (pardon my French) Motha Fucka, so who was I to stand in his way! Designed this myself, using a google image.
Suffice to say, David loves the pedal.
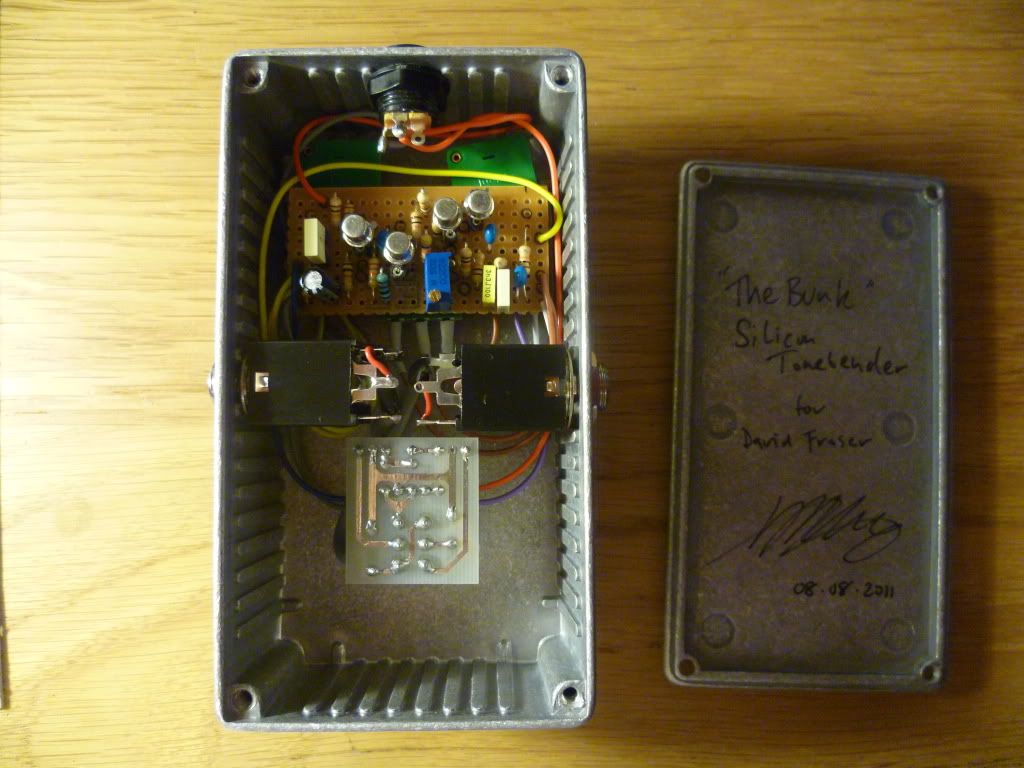
Heres the internals. Used some nice enclosed jacks which seem robust. Definitely space conscious!
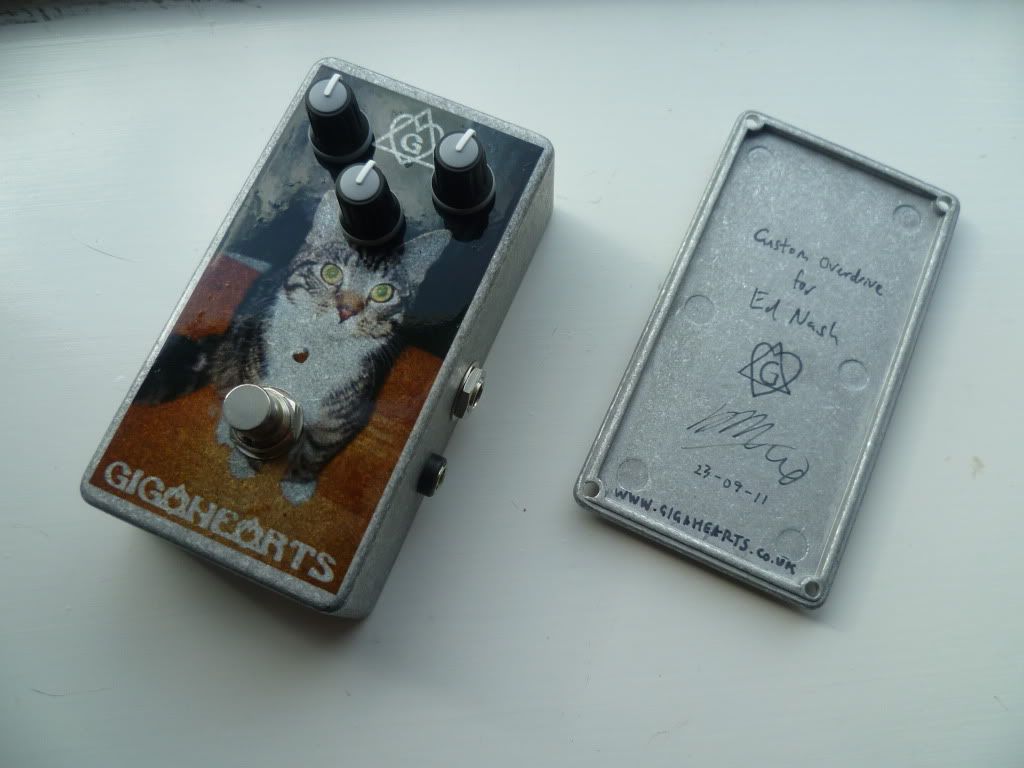
Next up I was very happy to be commissioned to make a Hot Cake for Ed Nash from up and coming band Bombay Bicycle Club. They have just released their third studio album and I think this one will really break them. They had a first single called Shuffle check it out and if you like it go see the album. Its really fantastic. So Ed's commission was much simpler. He knew exacly what he wanted. A Hot Cake, with a picture of his cat on it.
Keen eyed will see the name Gigahearts and a heart hexagram logo on this pedal. You will see it on other ones to come. I have started a small company, or more to say I have a brand name. I will make a whole new post on the subject after this one...
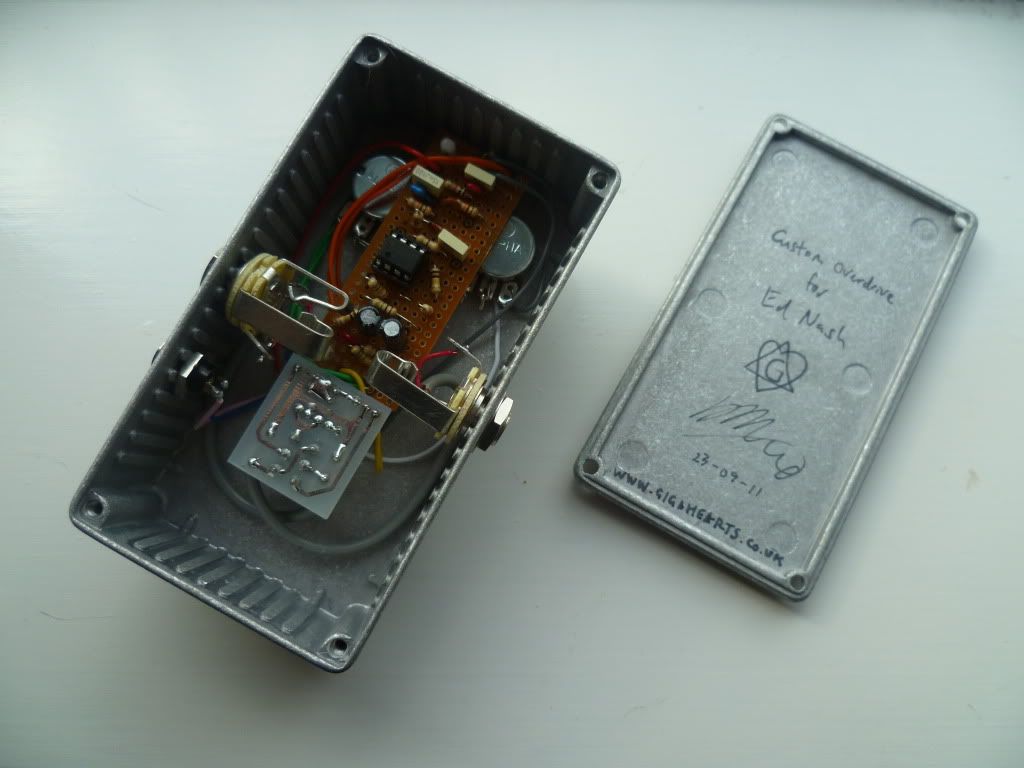
Here are the guts. Annoyingly, my trusty DPDT daughter board switching arrangement doesnt ground input when in bypass, so I subsequently rewired this with a 3PDT Cliff high quality stomp because the pedal was oscillating in bypass :( Odd as this has never been an issue with MANY builds of mine including very high gain stuff like the Dr Boogie. Anyway, not a massive issue. Good learning point for any readers, if your overdrive or distortion device has oscillation bleed in bypass, it is most likely due to the input not being grounded in bypass. Certain arrangements for DPDT with millenium bypass and 3PDT schemes do allow for this, and its definitely worth doing. Check here for all the details http://www.generalguitargadgets.com/index.php?option=com_content&task=view&id=33&Itemid=27
Thats it for now, I will be back shortly with part 2 and maybe part 3....
Thanks for reading. Happy soldering.
Tuesday, 2 August 2011
Other bean builds...inc Commission
Ive been getting into these Madbean PCBs this week.
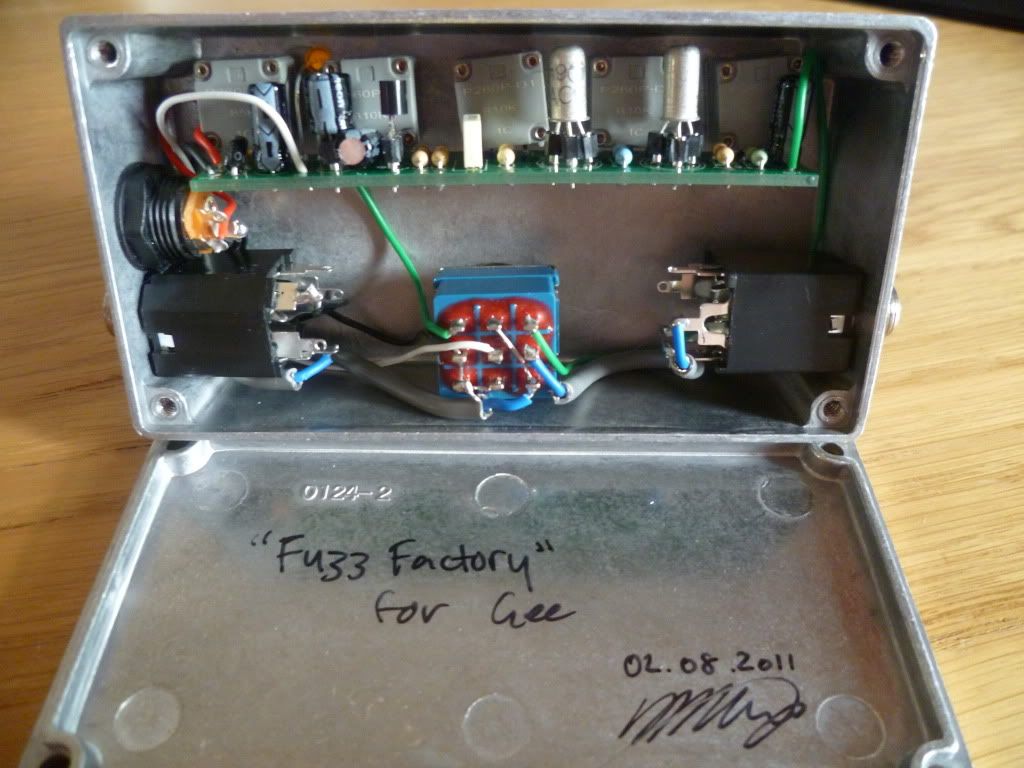
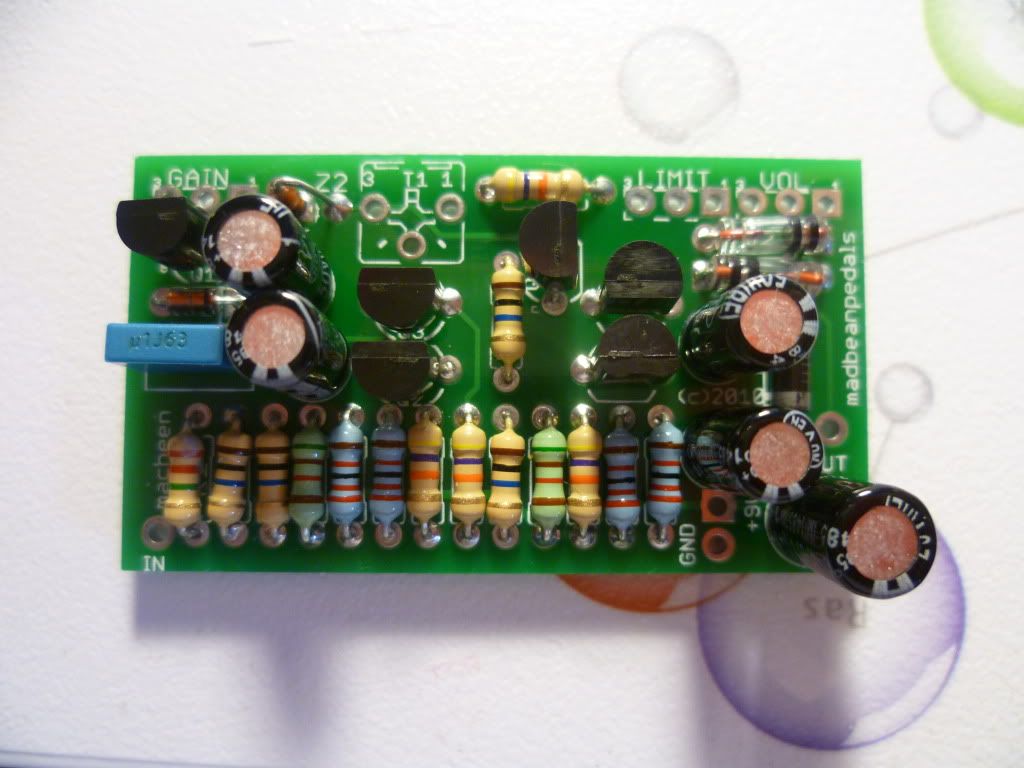
I also received a massive email off a guy called Gee through some contacts. Guy is a full on pedal fanatic (kinda like me and I guess others reading this blog). He has a massive wish list that included a Fuzz Factory, so using beans Zombii board, I made one for him. Its unfinished at present so just the guts for now:
Genuine Ac128s for that vintage tone, sounds pretty neato! I also socketed the input cap, so if its too bright it can be tamed. Stock is 10uF, but I've put in a 47uF for now. I reckon when its complete and shipped off I can whack a 10uF in with it and Gee can plug that in and see what he prefers.
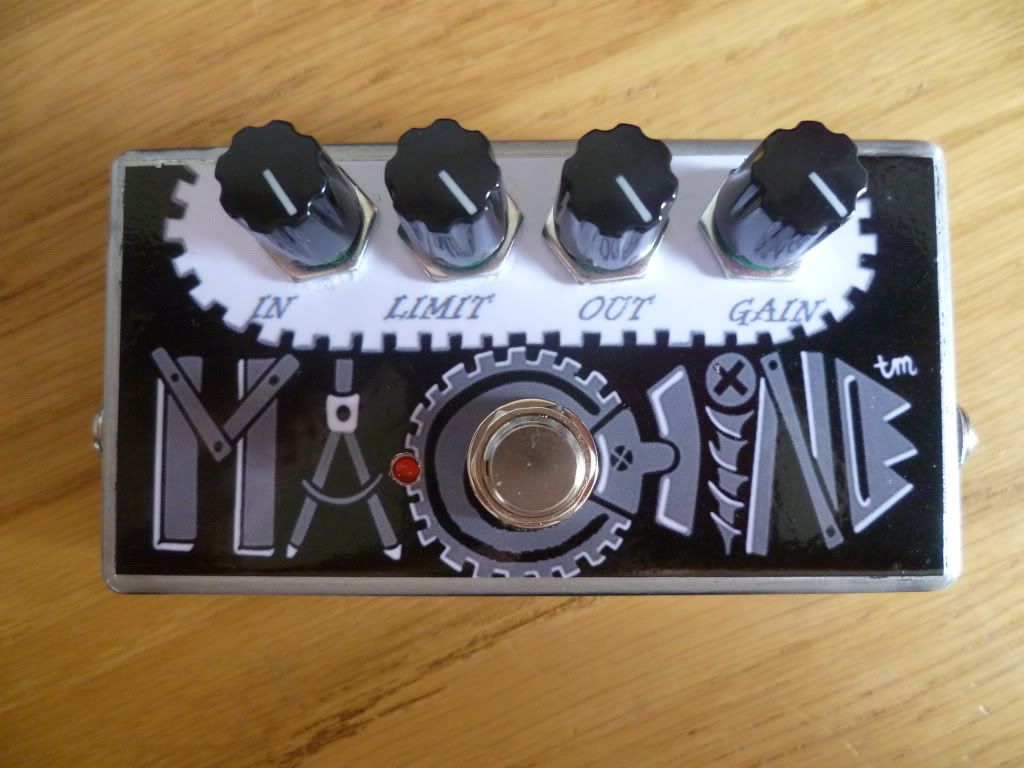
Next up on my mad old rush to get through these Madbeans, is the Macheen (obviously, the Zvex Machine).
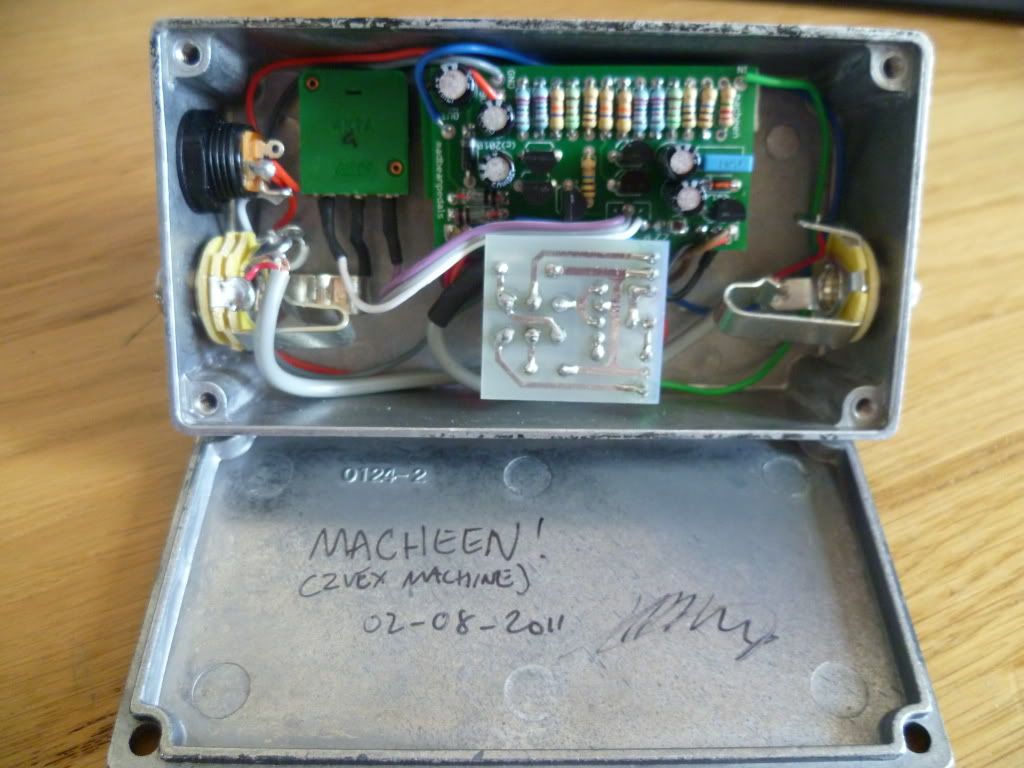
This one caused me some bother cos I thought I'd be all fly and use this ribbon cable, but its more hassle than its worth. Fudge using this stuff again. Too brittle, probably just a cheapo - but I dont see any significant advantages. For one, its a pain to strip and tin the wires...
For this build i took the advice and instead of installing a trim pot, I wired a full blown pot (labelled Gain), which is a cool thing to have on the front of the box. Shoulda been called Intensity, but I like snappy titles.
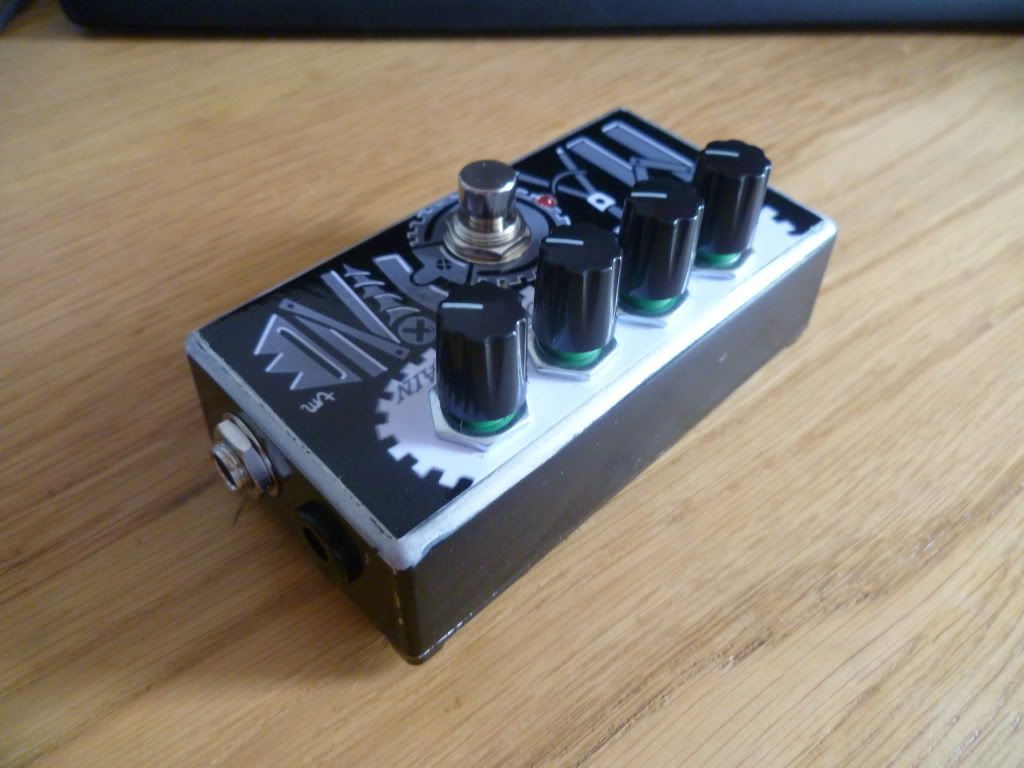
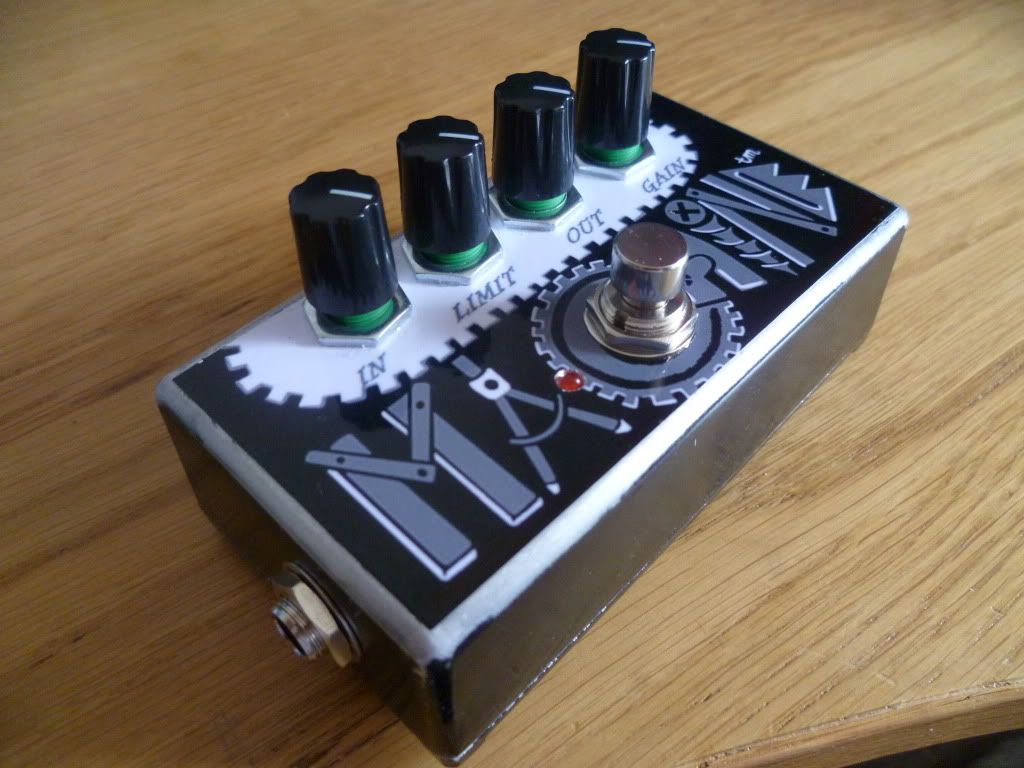
Anyway, after a few joints needing fixing, this is the result. Artwork of course a flagrant rip, just the way I like it!
This pedal was primed and sprayed black pretty roughly, then I sanded the front to apply the decal, and roughed up the edges a bit to add to the industrial vibe.
Heres one more
I think it looks pretty neat. Ive subsequently swapped the black knobs for white for a goof. Think I like it!
Heres the guts. Keen eyes will have already spotted some greeny plastic pots. These are 16mm Omeg conductive plastic type from Rapid. Ill see how they hold up over time.
Finally, here is the gutshot!
It sounds sooo nasty on its own, havent had time to audition it in front of some other distortions. Apparently, thats its intended application!
Next I hope to finish the Pork Barrell chorus, and I have to make a damn tonebender at some point :P
Ciao.
Sunday, 31 July 2011
First Madbean Build
I've done a number of pedal builds now, most of them Vero.
Vero is awesome. Its cheap, its fun to work with, and it feels really old school and DIY to me. Sure its a lot of work sometimes, but its so accessible (you literally only need a tool to cut traces with and thats it).
PCBs are next level stuff. Some folk etch there own 1 sided copper PCBs. Some people buy them from vendors such as Barry at guitarpcb.com who I have used in the past and will do again the future. Others prefer the totally professional route of 2 sided fabricated PCBs with silk screening etc. There is one notable vendor that offers PCBs and projects of this type at a seeminly unfathomable cheapness and completeness (7 page PDF detailing how to build a simple booster pedal? Yes please! ) This guy is Madbean (Brian) and his site is pure awesomeness: http://www.madbeanpedals.com/
As you can see if you take a look, he has projects based on all of the most popular current and older boutique or classic FX. I recently purchased from him some that were on sale, or too good to pass up. These were, the Zvex Machine, Fuzz Factory (x2) and 2in1, aswell as his Pork Barrell (Boss CE-2 with mods) and the Yellow Shark, which is the BJFe Honey Bee. All this was like...$40 delivered to the UK. Ridiculous. And the board quality is fantastic. And I will mention again the support materials, which are second to none.
Of course there are other vendors out there, many of whom do complete kits such as Musikding, GGG et al but they are all more expensive than Madbean. Plus, Brian gives so much to the DIY world I wanna support him and his products.
So onto my first Madbean built. Its gotta be said that this was the easiest thing I have ever thrown together, and was done with the minimum of fuss, and fired up first time.
Pictures speak louder than words:
The supplied drilling template was a godsend for this with the onboard pots and LEDs. Of course this is optional, but thats the whole point, right!?
The pots I used werent the classic green Alpha 9mm. Those seem to be at least £2 per peice and was too rich for me once you factor in E$8 shipping from Banzai or Musikding, where I could find them in stock, or waiting weeks from the USA plus import duty....I used a 12mm variety from Rapid (my favourite place for bulk parts, free next day over £30 fact fans). For those interested, these are the ones: Pots from Rapid
Note, the body is deeper, so I needed to bend the pins so the pots fitted without occluding the other components on the board. Everything worked out and fitted perfectly in the case.
For the decals I used the ideas and colours from Zvex but not a direct copy. Im happy with them.
Next up I will start to run through the rest of the Madbean boards, and I have made a massive leap into starting my Lovetone Ring Stinger clone....boards 95% complete !!
Cheers
Wednesday, 27 July 2011
Verification!
I managed to successfully put together my Big Cheese layout, and it fired up first time - honest - no messing about here.
I dont think there is any need for the large layout so I wont bother with that one, the 28x18 is pretty accomodatable in a BB size enclosure.
So here it is, my prototype, which I will probably sell, if someone wants it.
Not finished yet, as if I get a buyer I'll let them custom choose the grapics. I was going for a layout with the chicken heads to ape the original Cheese.
Here is the insides, for the most part I used Guitarpcb.com green hookup wire. This stuff is great! I need to order more.
Hope some other people can build this and make use of the layout.
Here is the latest official version (updated 09/09/11):
If anyone builds it please show and tell!
Wednesday, 20 July 2011
My First Vero Layout
I thought I would give something back to the community that has afforded me so much education, excitement and enjoyment over the last 6 months. Sure, I've just rejigged the OLC PCB layout for the Big Cheese, but damnit I'm proud of myself and noone else was going to do it (!)
Its very wide, but I reckon it'd fit in a BB sized case. If not someone can rework it - possibly me while I take a breather and learn some more.
For now, feel free to give this one a shot. Ill try to verify this next week. Not gonna have time this week and away all weekend.
Its very wide, but I reckon it'd fit in a BB sized case. If not someone can rework it - possibly me while I take a breather and learn some more.
For now, feel free to give this one a shot. Ill try to verify this next week. Not gonna have time this week and away all weekend.
And a Smaller version which is probably better...
Edit - Here is the latest proper version. Very happy with this (09/09/2011)
Edit - Here is the latest proper version. Very happy with this (09/09/2011)
Tuesday, 19 July 2011
Big pedals to trip over...
Those few that have read this blog have probably picked up a couple times that I have a fondness for Lovetone effects pedals. These tasty beasts (and beasts they are) were made in England on and off for about 10 years or so in the mid 90s to early 00's. The range of effects was diverse and interesting, even their simple overdrive and fuzz designs had something esoteric going on. Someone is still paying web hosting on their site, which you can review to your leisure, they still have the flash sound files to listen to.
Lovetone was a marriage of the design expertise of a chap called Dan Coggins, and the marketing savvy of a chap called Vlad Naslas. I chatted with Vlad on the phone one time when I was a poor student and was [ ] this close to buying a £349 + £10 shipping Flange with No Name ? from him. I didnt in the end, seeking one out on ebay for a much more reasonable £270 (still a lot, and I regret selling it ever since). He seemed a cool guy if a bit short on time.
Anyhow, the line was started with a couple of standalong noise makers called the Brown Source Overdrive and Big Cheese distortion. I think they originally sold for something in the order of £150, reasonable especially when people pay that today for Zvex's offshore derived Vexter series pedals. Everything about Lovetone was made in the UK AFAIK, I know the PCBs were fabbed in the UK, and many parts Ive later come to realise actually can be sourced at Maplin. I doubt Lovetone used Maplin directly, but perhaps they started out, much like me, at a Maplins, buying some bits many years ago. Im going misty eyed as I write just imagining...haha.
These devices have the standard Vol Tone Gain combo, with a natty 4 way switch for different tones, inc a tone bypass option on both. The Cheese had a fourth gated setting reminiscent of things like the wolf computer, and Fuzz Factory, and all things 8-bit sounding. Very cool. Along the way the Lovetone line was followed by many a top band and producer, and were always pitched as at least equally (if not moreso) useful in a studio environment than on a pedal board. Certainly this is the case for the more wacky and involved processors. Ill likely get to those later in another blog...
So, these days, Lovetone is long out of business and the remaining pedals change hands for absurd amounts of money on the free marketplace that is the internet, or more typically eBay. Even the Big Cheese, which at a guess I would say was the largest produced item next to the Meatball, changes hands for over £400 without exception. Over the years this has created opportunity for cloners and the like to make their own versions. OLC came up with a variant called the Chunky Cheese, which is what I am basing my Cheese on. I also had, but also (again regrettably) sold on another clone called a Fromunda Cheese which had a nice hammered gold case, and was drilled so you could adjust the gate trim from the outside. Very cool. Wish I still had it.
Now then, onto my clone. Lovetone saw fit towards the end of their run in business to offer a large version comprising the Big Cheese and Brown Source in one pedal, named fittingly the Cheese Source. At the last time of marketing (via Dan Coggins Dinosaural brand) the CS was sold direct for £350. Of course that seems "cheap" dare I say it in face of £600 and rising on eBay these days.
My clone consists of the OLC Chunky Cheese which I have made on perf board (first attempt, never say never again, but it wasnt as easy as vero to pull off) and a Doug Hammond Tone Source on vero. The Tone Source is Dougs ode to the Brown Source, and changes a couple of things, adds more tonal options etc. You can read about it here.
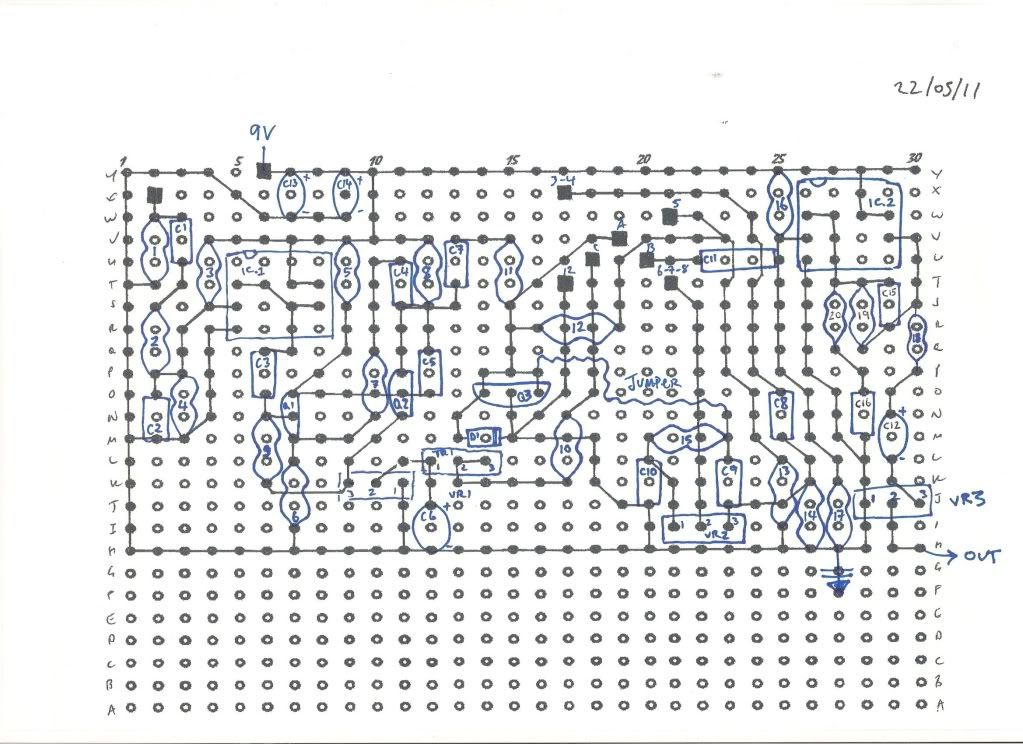
Layout is my own for the Cheese
Here is the Doug Hammond Tone Source
Here are some pics of the Cheese Side. If I am honest I think its a decent attempt for a first perf.
Quickly wired up to verify.
Here are the guts of the final pedal. This took some debugging, and I will replace the drive pot on the source side at some point, right now Ive fudged a 100k pot down to about 20k using this handy page: Analog Alchemy. I had to get rid of some popping using pull downs on the footswitches but i think thats all linked to a grounding error that i have now solved. Anyway, no tone suck with this so they can stay.
Its not the neatest thing in the world, and its in a massive box (!) shame on me. But hopefully its robust which is what matters. And the sound. Wonderful. The Big Cheese has gotta be one of the classics. Its really rude and fuzzy and great. The Tone Source, like the Brown Source, seems best at providing boost, and colour. Theres definitely lots of tonal variety thanks to Dougs revisions, and the tone pot really works and has a lot of scope. There is barely any drive here at all though - think more like the low gain ODs that people seem to love, like the (dare I say it) BJFe Honey Bee. It all seems to work like it should, and you can patch in effects with the source in and cheese out, kinda like an FX loop. I tried a flanger in there and it worked a treat.
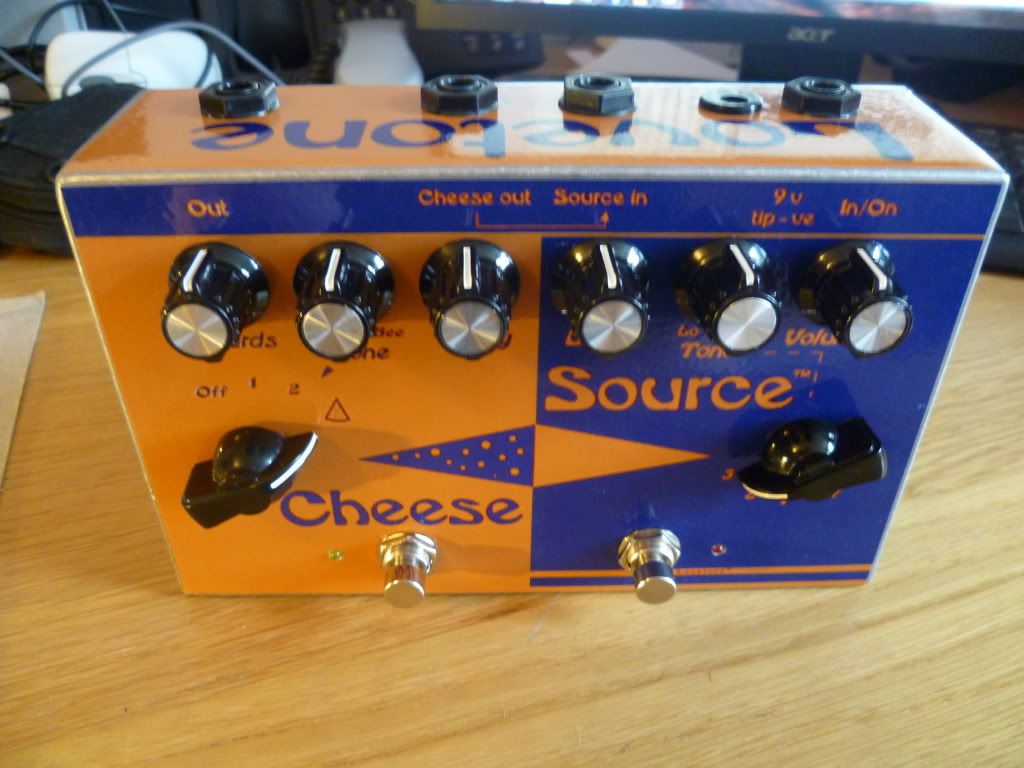
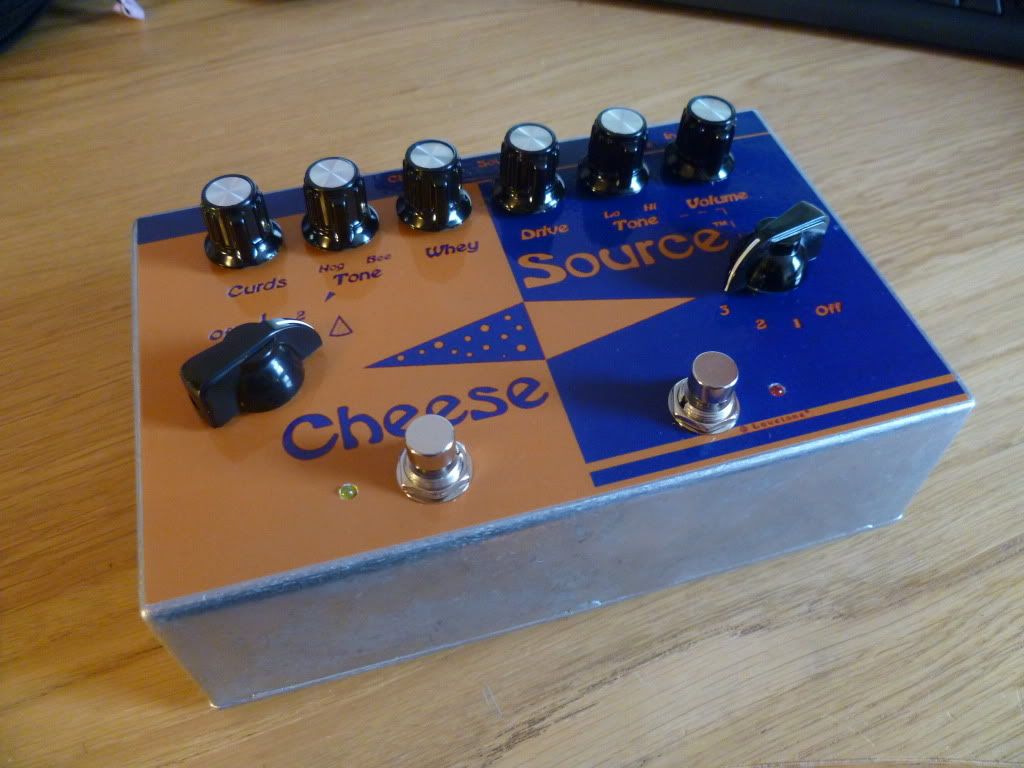
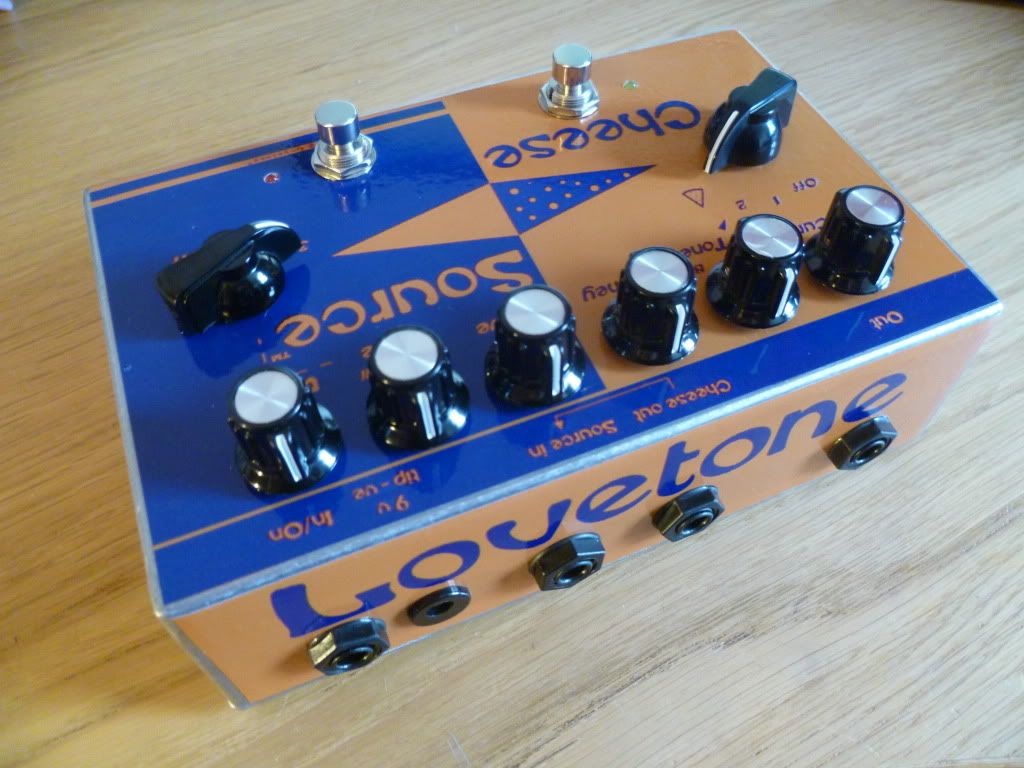
As for the outside aesthetics, there was only ever one thing in mind. Direct replica of the original. Only real difference is the LED position (Lovetones use large PCBs with onboard LEDs). However I think it looks fantastic, and yes ,I have located the original knobs (Maplin of all places - astounding).
Here are some glamour shots for the beast. FYI the box is an Eddystone P/N 26827PSLA 188x120x57mm from Rapid for around £10. Graphics are on white decal vinyl. I might do the front and sides at some point, as yet undecided.
The original unit for comparison sake
Overall its one of the coolest things I've ever done. If you had told me back in February when I picked up a soldering iron I could make a Loveclone in 6mths Id have laughed it off... There are a lot of firsts in this build too - First Perfboard, first FX send and returns with break jacks, first build with rotary jacks, first build that wasnt 1590b or bb sized enclosure. And first Lovetone clone. Yes, thats right, keep it peeled for a certain pink monster looming on the horizon...
Over and out!
Lovetone was a marriage of the design expertise of a chap called Dan Coggins, and the marketing savvy of a chap called Vlad Naslas. I chatted with Vlad on the phone one time when I was a poor student and was [ ] this close to buying a £349 + £10 shipping Flange with No Name ? from him. I didnt in the end, seeking one out on ebay for a much more reasonable £270 (still a lot, and I regret selling it ever since). He seemed a cool guy if a bit short on time.
Lovetones finest
Anyhow, the line was started with a couple of standalong noise makers called the Brown Source Overdrive and Big Cheese distortion. I think they originally sold for something in the order of £150, reasonable especially when people pay that today for Zvex's offshore derived Vexter series pedals. Everything about Lovetone was made in the UK AFAIK, I know the PCBs were fabbed in the UK, and many parts Ive later come to realise actually can be sourced at Maplin. I doubt Lovetone used Maplin directly, but perhaps they started out, much like me, at a Maplins, buying some bits many years ago. Im going misty eyed as I write just imagining...haha.
These devices have the standard Vol Tone Gain combo, with a natty 4 way switch for different tones, inc a tone bypass option on both. The Cheese had a fourth gated setting reminiscent of things like the wolf computer, and Fuzz Factory, and all things 8-bit sounding. Very cool. Along the way the Lovetone line was followed by many a top band and producer, and were always pitched as at least equally (if not moreso) useful in a studio environment than on a pedal board. Certainly this is the case for the more wacky and involved processors. Ill likely get to those later in another blog...
So, these days, Lovetone is long out of business and the remaining pedals change hands for absurd amounts of money on the free marketplace that is the internet, or more typically eBay. Even the Big Cheese, which at a guess I would say was the largest produced item next to the Meatball, changes hands for over £400 without exception. Over the years this has created opportunity for cloners and the like to make their own versions. OLC came up with a variant called the Chunky Cheese, which is what I am basing my Cheese on. I also had, but also (again regrettably) sold on another clone called a Fromunda Cheese which had a nice hammered gold case, and was drilled so you could adjust the gate trim from the outside. Very cool. Wish I still had it.
Now then, onto my clone. Lovetone saw fit towards the end of their run in business to offer a large version comprising the Big Cheese and Brown Source in one pedal, named fittingly the Cheese Source. At the last time of marketing (via Dan Coggins Dinosaural brand) the CS was sold direct for £350. Of course that seems "cheap" dare I say it in face of £600 and rising on eBay these days.
My clone consists of the OLC Chunky Cheese which I have made on perf board (first attempt, never say never again, but it wasnt as easy as vero to pull off) and a Doug Hammond Tone Source on vero. The Tone Source is Dougs ode to the Brown Source, and changes a couple of things, adds more tonal options etc. You can read about it here.
Layout is my own for the Cheese
Here is the Doug Hammond Tone Source
Here are some pics of the Cheese Side. If I am honest I think its a decent attempt for a first perf.
Quickly wired up to verify.
Here are the guts of the final pedal. This took some debugging, and I will replace the drive pot on the source side at some point, right now Ive fudged a 100k pot down to about 20k using this handy page: Analog Alchemy. I had to get rid of some popping using pull downs on the footswitches but i think thats all linked to a grounding error that i have now solved. Anyway, no tone suck with this so they can stay.
Its not the neatest thing in the world, and its in a massive box (!) shame on me. But hopefully its robust which is what matters. And the sound. Wonderful. The Big Cheese has gotta be one of the classics. Its really rude and fuzzy and great. The Tone Source, like the Brown Source, seems best at providing boost, and colour. Theres definitely lots of tonal variety thanks to Dougs revisions, and the tone pot really works and has a lot of scope. There is barely any drive here at all though - think more like the low gain ODs that people seem to love, like the (dare I say it) BJFe Honey Bee. It all seems to work like it should, and you can patch in effects with the source in and cheese out, kinda like an FX loop. I tried a flanger in there and it worked a treat.
As for the outside aesthetics, there was only ever one thing in mind. Direct replica of the original. Only real difference is the LED position (Lovetones use large PCBs with onboard LEDs). However I think it looks fantastic, and yes ,I have located the original knobs (Maplin of all places - astounding).
Here are some glamour shots for the beast. FYI the box is an Eddystone P/N 26827PSLA 188x120x57mm from Rapid for around £10. Graphics are on white decal vinyl. I might do the front and sides at some point, as yet undecided.
The original unit for comparison sake
Overall its one of the coolest things I've ever done. If you had told me back in February when I picked up a soldering iron I could make a Loveclone in 6mths Id have laughed it off... There are a lot of firsts in this build too - First Perfboard, first FX send and returns with break jacks, first build with rotary jacks, first build that wasnt 1590b or bb sized enclosure. And first Lovetone clone. Yes, thats right, keep it peeled for a certain pink monster looming on the horizon...
Over and out!
Subscribe to:
Comments (Atom)

